Add New Profile Update Form
Creating a New Profile Update Form
To add a new Profile Updates form, select Pages > Profile updates > New Form.
Setting Form Properties
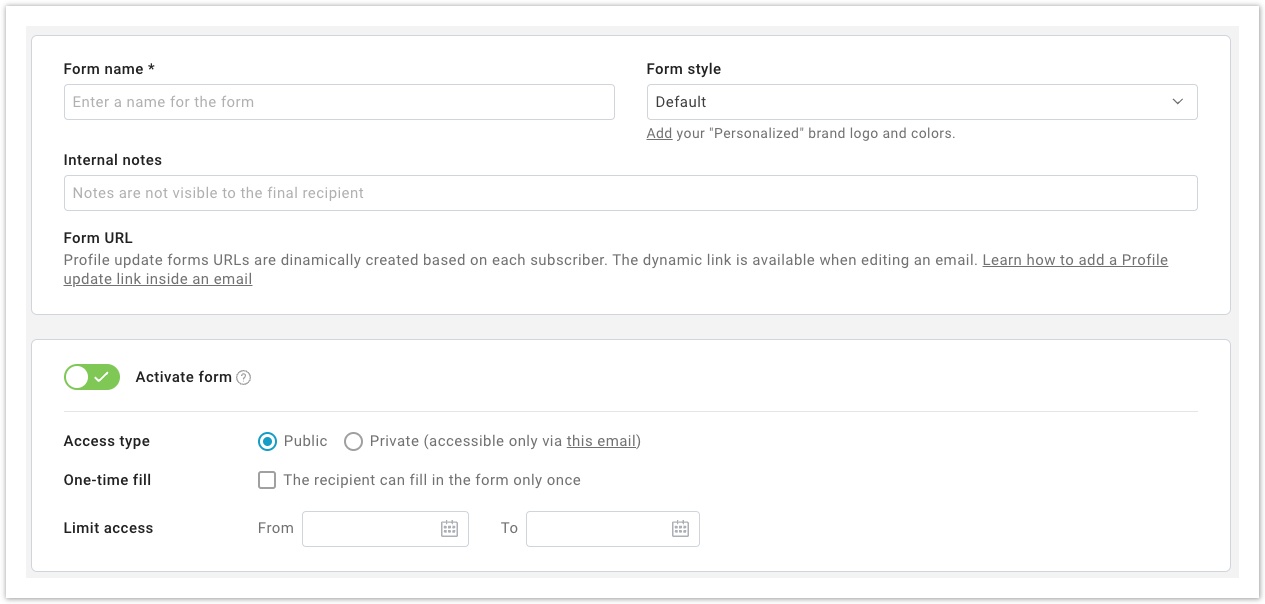
The system will ask you to configure the following properties:
- Form name: enter a name for the form: this is not shown to your recipients.
- Internal notes: enter a description for what the form is for. This is also not shown to your customers. It's for internal, administrative purposes only.
- Form style: select the color of your form.
- Activate form: click to enable the form. You will need to enable it to test it. Since there are no public links to the form (until you include a link to it in an email message), you can enable a form even when you are just working on it.
- Access type: specify when the form is Public or Private. See the section below for an explanation of the difference.
- One-time fill: specify whether the same recipient may update the form multiple times or not. This is useful when you are using the Profile Updates feature as a basic survey tool.
- Limit access - From and To se: you can decide to make the form accessible only between certain dates. This is useful, for instance, if you are using the Profile Updates feature as a basic event registration tool.
Creating a form with the drag & drop editor
The profile update form builder allows you to create these forms in a whole new, super-easy way. In fact, you will build profile update forms via drag and drop without the need of any HTML knowledge!
In the example below, we created a form that allows subscribers of a newsletter by a local chain of pizzerias to update their profile.
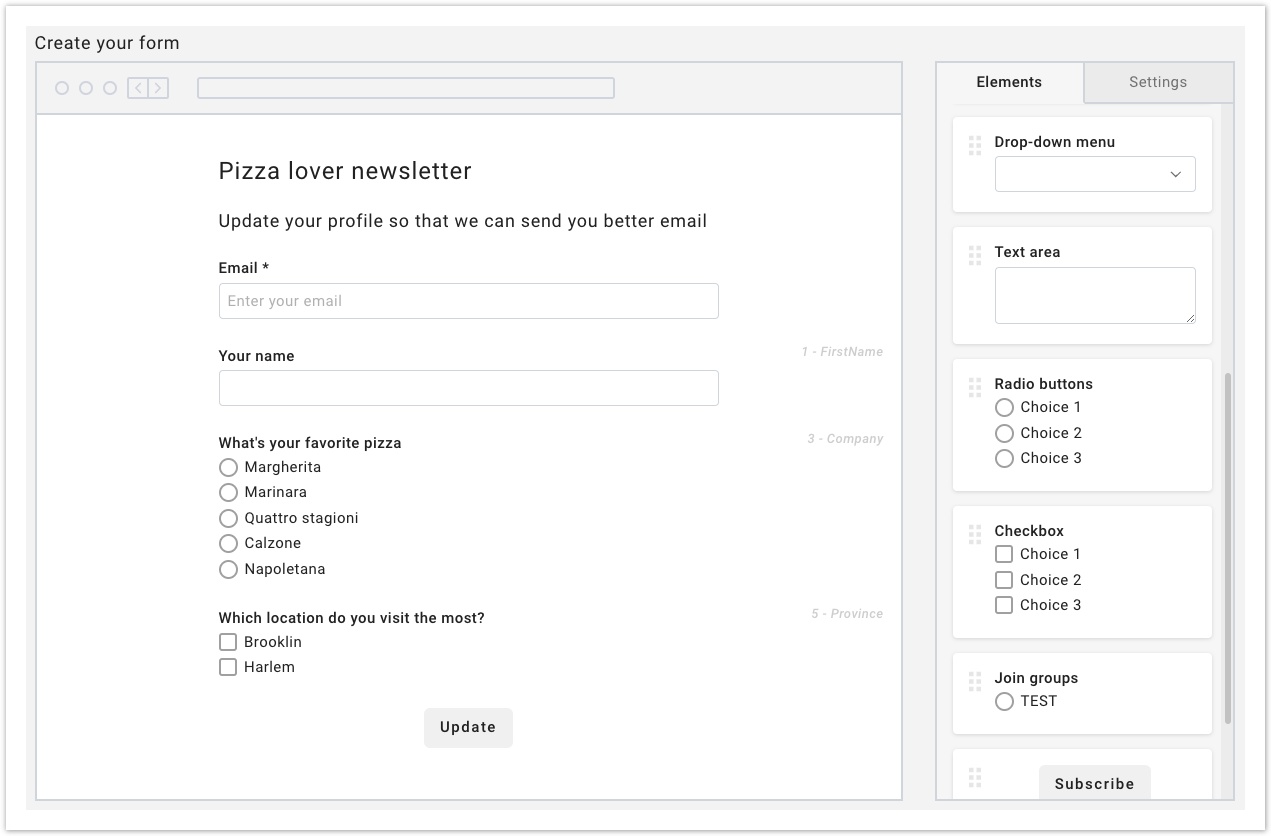
To create a form:
- Drag and drop the elements that are part of your forms. Rearrange their order by dragging.
- Configure the settings for each element by clicking on the blue "pencil" button. You can add text, groups and recipients fields, configurable with different types of inputs (free text, drop-down, radio buttons, checkboxes)
- Preview your form to see how it renders
- Save it!
Other features
- Quickly search and select groups to use in the Group form element, and rename them if needed (e.g. group name used in MailUp is not the text label you wish to show in the form)
- Add a privacy checkbox, which is fully editable. You can then edit the link and place the URL of your Privacy Policy page
- Use special syntax to customize the input values in drop-down options. Example below:
The subscriber sees Rock Music in the drop-down menu, but MailUp records Heavy metal as the number 1 into the recipient field. Customizing these options into numbers, for example, can help you when having to setup filters or other tasks. Numbers are much more manageable than text. The syntax looks like this: Heavy metal || 1, where the || is a special character.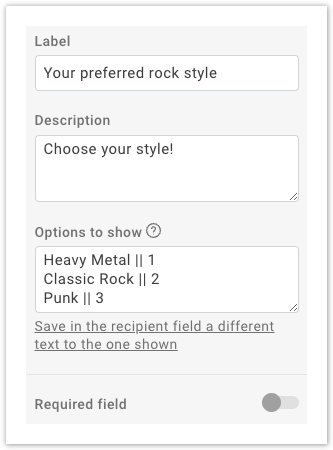
Editing a form with the HTML editor
You can no longer create a form with the HTML editor, but you can use it with any form created with the HTML editor, before the new editor was introduced, or with HTML copies of forms created with the new editor.
Public vs. Private Forms
When the form is public, the person that receives a link to it can immediately view it and edit it.
When the form is private, the person that receives a link to it cannot immediately view it and fill it out. Instead, they are shown a message that prompts them to check their mailbox: an email message is sent to the email address associated with the link. The message is referred to as the "Private Form Access Email".
Invisible reCAPTCHA
The reCAPTCHA is a service that protects your form from spam and abuse that consists in asking one or more questions when an atypical behavior is detected. It protects users from spam and password decryption by asking them to complete a simple test that proves that the user is a human being and not a computer trying to break an account.
We call it "invisible" because it is activated when an atypical behavior is detected.
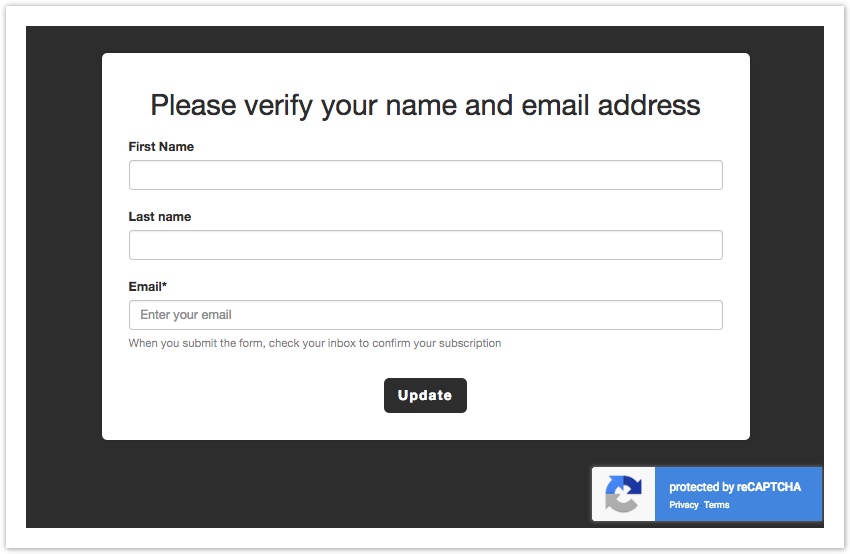
The invisible reCAPTCHA is by default enabled in forms.

Please note that if the invisible reCAPTCHA is enabled, the form won't be embeddable in a website.
Edit post-profiling pages
Users, after filling in a profiling form, view a page with the result ("Data registered correctly" or "Warning, the user is unsubscribed" etc). This page can be customized or replaced with a dedicated landing page, created with our landing page editor or hosted on your site.
You can set up a post-signup experience:
- the same for all profiling forms - establishing a default at list level on the Post-profiling page
- different for each form - option available according to the active subscription plan.
How to Send the Form to Your Recipients
The form is not sent directly to your customers. Instead, you will place a link to the form in an email message that you will send to them. Recipients of the message will click on the link to view and fill out the form in their browser. To send the link:
- Create a new email message
- If you're using BEE, you can link the form to a button, by selecting it and choosing Special Links in the "Action" section of "Content Properties".

You may also link a profile update form to a portion of text, by highlighting it, toggling the advanced toolbar with the arrow in the top right and selecting Special links > Profile update forms
- If you're using the HTML editor, you can link a part of the message to a profile update form using the "Profile Update link" found in Insert > Subscription
- If you're using BEE, you can link the form to a button, by selecting it and choosing Special Links in the "Action" section of "Content Properties".
- Finalize and save the email message
- Send it to a test group to simulate the entire process
- When you get the test email, fill out the form and submit it
- Confirm that the Recipient Fields associated with the recipient that updated the form have been successfully updated