SMTP Settings
About Configuring SMTP+ feature in your platform and you control panel
SMTP+ users will need to first configure SMTP+ in control panel (see Configuring Server Access and users in control panel,) and then you use the SMTP+ credentials to configure the control panel SMTP+ in your own application/email client. Below are the various applications/email clients typically used:
Configuring applications and email clients to use SMTP+
Here are more specific instructions related to the specific email client or application you are using to connect to the control panel SMTP+:
- Outlook
- WordPress
- Magento
- Salesforce
Configuring server access and authorized users in control panel:
Creating a separate list
Although it's technically not a requirement, we recommend that you create a new List in your control panel account to be used for SMTP+. Messages, statistics, and other settings will be easier to manage that way.
Once you have created a new List, you can start configuring SMTP+ in the List settings area.
Managing users
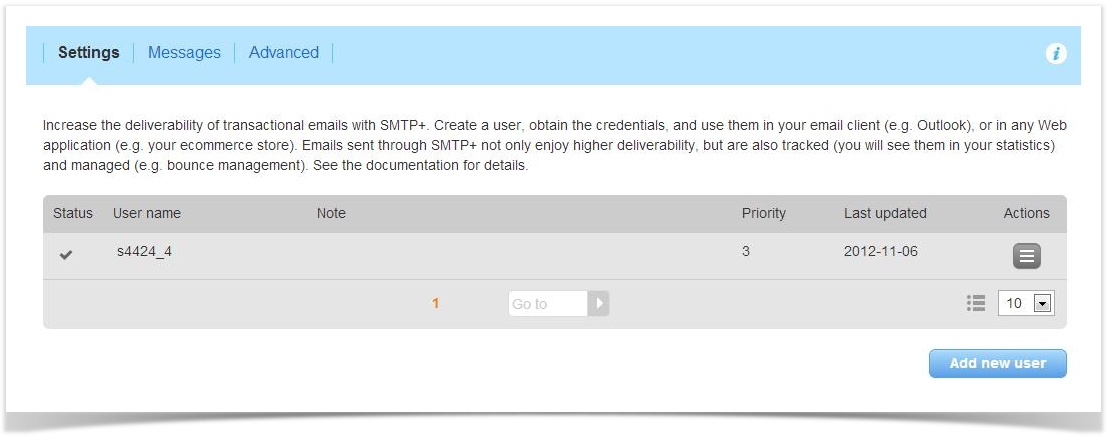
The page Settings > List settings > SMTP+ > Settings displays the following information:
- data for SMTP+ configuration within your mail client: SMTP server address, port and type of encryption
- the list of the users that have been created (enabled or not) for SMTP+ message sending
- button for adding a new SMTP+ user
You can perform the following actions with regard to users:
- Edit: edit user settings (see below)
- Delete: delete a user enabled to SMTP+ message sending
- Add new user: create a new SMTP user through a menu that closely resembles the Edit menu
Adding and editing SMTP+ users
What's on the add/edit user window
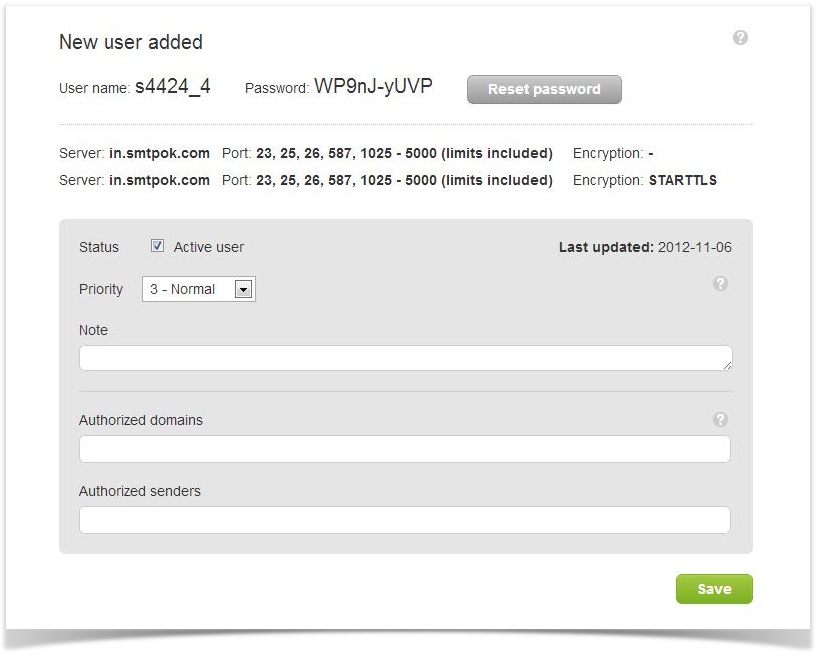
When you add or edit a SMTP+ user, you will see the window displayed below. In the top part of the window, you will find the credentials (user name and password) that you will enter in your email program as the outgoing mail server authentication credentials.
Below the credentials is the outgoing mail server address, and the port to be used, which are also needed to configure your email client.
Within your email client, you can configure the following ports: 25 and all the ports from 1025 to 5000. On all the ports, you can have as an option the encryption through STARTTLS extension.
Other features and parameters:
- Reset password: creates a new password associated to that user. Once it has been generated, the password cannot be read in any control panel. Anyway, it is possible to reset it as many times as desired.
- User status active: the selected user is active if the corresponding box has been checked.
- Priority: default priority associated to the user during SMTP+ message sending. The priority used by the system will be the higher between the priority associated to the user and the priority srt during the creation of the message. You typically don't need to change this.
- Note: You can insert here a brief note for internal use about the user that you have just created
- Authorized domains:
- One or more domains authorized as senders, separated by ";".
- All email addresses at those domains will be authorized. For example, you could enter: yourCompany.com;yourOtherCompany.com
- You can use both second level and third-level domains: for example, 2nd level domain: yourCompany.com; 3rd level domain: marketing.yourCompany.com
- Authorized senders:
- specific email addresses authorized as senders, separated by ";".
- For example: info@yourCompany.com;sales@yourCompany.com;john.smith@yourCompany.com
How sender authorization works
The way the system handled non-authorized messages has changed.
- If all authorization fields are empty, all senders are authorized (i.e. both the authorized domains and authorized senders fields are empty)
- Prior to version 8.2.4 and above, an alert was sent when a non-authorized sender was detected, as configured in the Alert Center. The message, though, was still sent.
- With version 8.2.4 and above, a new feature was introduced that allows you to cancel the mailing if the sender is not authorized. When that feature is on and a message is sent from an unauthorized sender, the message is blocked and an alert is sent.

Message priority
Email messages can have a priority assigned to them. For example, when you flag a message as important upon sending it from your email client, what you are doing is actually changing the priority parameter of the message.
All the messages sent from within the control panel admin control panel have a default priority of 3 - normal.
By default, messages sent with SMTP+ are sent with the same priority and will be queued up together with the other messages.
You can raise the priority of the messages sent with SMTP+ using the corresponding drop-down. If messages are sent with a higher priority, they will be sent before any other messages, in first place in the sending queue. Scheduled messages or messages being sent are stopped for the time required to send the high priority messages, and then they resume when the bandwifth is available again.
Note that if you sent a priority of 1 - very high priority, the message appears differently in the email client of the receiving person.
This is typically not something that you wish to have, unless the messages being sent are important alerts or alike.