Build workflow
You can build a flow of automatic emails in just a few minutes with the drag & drop workflow builder.
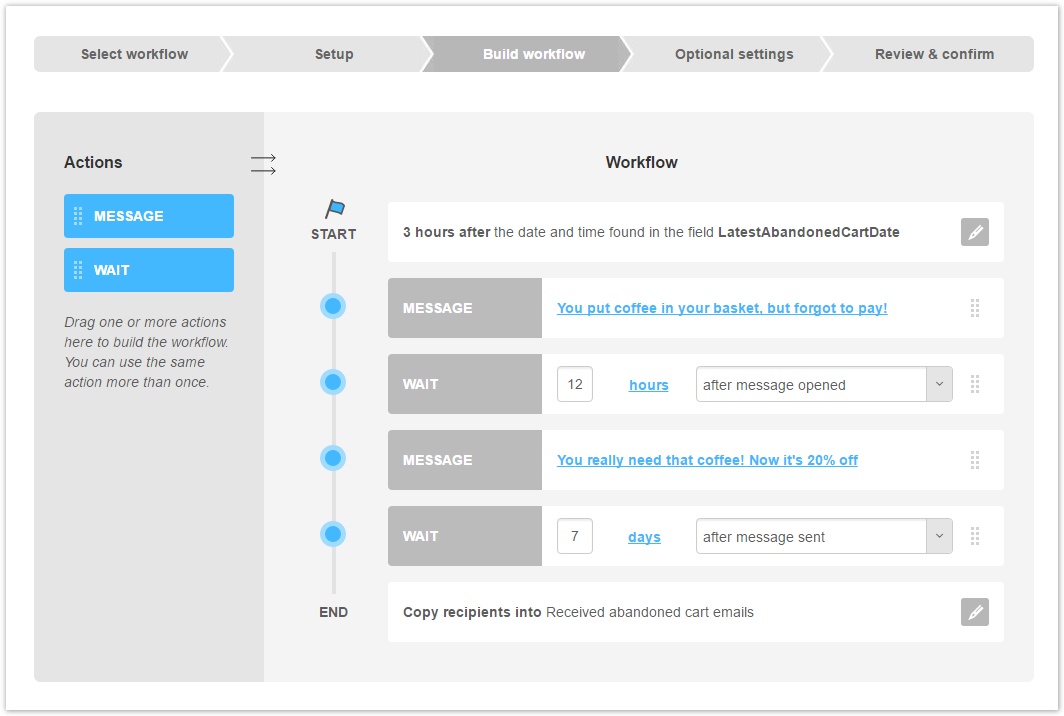
On the left there are the actions that you can drag in the workflow.
Message
Drag this element to select a message to send to the workflow recipients. After dragging it, click on "Choose a message" to enter the message selection window.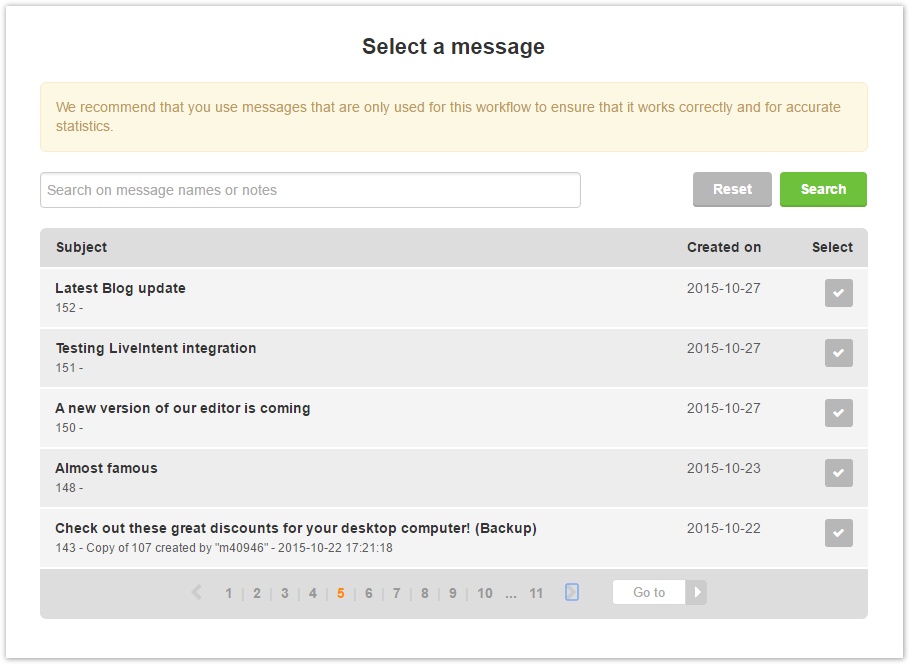
The list of messages will show up. You can perform a search by message name and notes. Clicking on a message name, you'll see its preview; click on the "Select" icon to add that message to the workflow.
Use dedicated messages in workflows
To ensure that the workflow works correctly and to get accurate statistics, we strongly recommend to use messages created and used exclusively in that workflow, i.e. do not reuse messages that are part of a workflow in other workflows/tasks or in regular mailings.
Wait

You can choose:
- how much time should pass before sending the next message
- if the waiting should be calculated based on when the previous message was sent, opened or clicked or based on a recipient not opening or not clicking on the previous message
- If the waiting is in days or hours, by clicking on the time measure unit (in the example above, "days")
Start and end
The workflow builder shows a graphical representation of the whole workflow. Apart from "Message" and "Wait" items, you will see:
- Start: it's the start condition defined in workflow settings. Clicking on the edit icon, you'll be redirected to those settings.

- End: it's the action performed by the workflow once it's over. Clicking on the edit icon, you can decide to copy or move recipients to a list group.
