How to schedule a mailing for different time zones
Overview
What if you have customers in different time zones, and you want all of them to get your message between 8 and 10 in the morning? For example, in the US there are four different timezones: Pacific time (PST), Mountain time (MST), Central time (CST), and Eastern time (EST). How can you send a message accouting for those time differences?
The time of day that your email campaign reaches your recipients' inbox matters. Scheduling your email campaign based on the correct timezone allows you to reach your recipients at the time you planned and reach the highest relevancy and ROI.
Scheduling a mailing in MailUp is a powerful feature and allows you to take advantage of time zones to adjust your mailing send time. Let's see how.
How to schedule the time zone and time of day
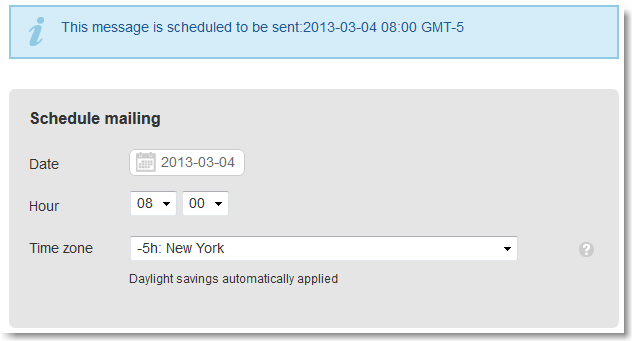
Select the message that you wish to send and go through the steps of choosing recipients for the mailing. Once you get to the mailing scheduling screen, click on the Schedule mailing section and you'll see the pop-up below.
- Choose the hour of day that you would like the mailing to start. For example, if you choose 8 AM, then the mailing will start at 8 AM.
- Choose the time zone for the mailing. For example, select -5h: New York if your mailing is for recipients in New York (i.e. Eastern time (EST: GMT -5hrs)). This means that your recipients will get your mailing starting at 8 AM EST.
If you want to send the same message to different sets of recipients, at different times, you first need to set up your recipients database so that you know where they are. Let's see how.
How to group recipients into different time zones
Let's continue on the US example. There are two ways in MailUp to find out in which US state recipients are located:
Using geolocation filters
You can set up geolocation filters to determine where recipients are based on their IP address at the time messages are opened or clicked. For more information, see using geolocation filters.
Using recipient profiles
Alternatively, you can collect information directly from your recipients, and leverage it in profile filters. For example, you could collect the US state of residence and save it into one of the custom recipient fields avaiable in your MailUp account. You can add data to recipient fields:
- When signing up new subscribers, by using a subscription form that includes the custom field that you need to collect
- When you are importing data into MailUp
- By augmenting existing recipient profiles by using the profile updates feature
- By using a third party application that is integrated with MailUp and transfers that information to it
Assigning recipients to groups
Once you have created geolocation or profile filters that allow you to segment recipients based on their location, you can create groups and assign recipients to them.
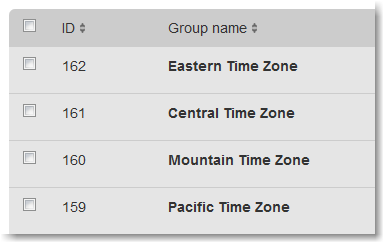
Continuing on the same example, the first step is to create separate groups corresponding to each time zone, such as Eastern, Central, Mountain, Pacific, or any other group.
Once the groups are ready, you can assign recipients to them by using one of the previously created filters. The steps are:
- Load the advanced search page (Recipients > Channels > Email)
- Select a filter in the advanced search options (e.g. a geolocation filter that you previously created)
- Run the search
- Copy the recipients to the group that corresponds to the search that you ran. Note: you will likely want to use the "Copy" feature and not the "Move" feature: otherwise recipients will be removed from any other group that they may have been assigned to, and into the group that you are assignment them to.
You are now ready to schedule your mailing to recipients in different time zones.
How to schedule the same email message for different time zones
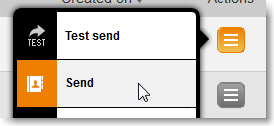
You can schedule multiple mailings of the same email message. Under Messages > Email > Send, select your email message, and click on Send.
In the Send email message page, select the group of recipients (e.g. Pacific Time in the example above), click on Continue, and click on Schedule mailing.
Now, schedule the date, time, and time zone, and you're all set!
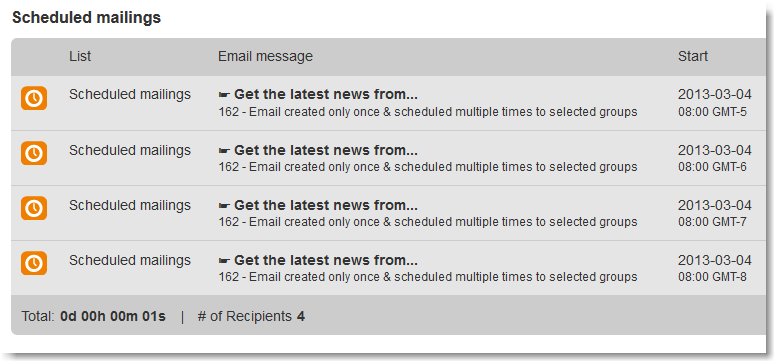
For example, the email intended for the Pacific Time group, will have the time zone set to GMT-8. For different time zones, repeat these steps.
In the example below, the same email message has 4 different mailings (for the associated group and time zone).
Note that the messages will be sent based on the sending speed that you are subscribing too. Using this type of scheduling actually helps you take advantage of your sending capacity.
For instance, let's say that you subscribed to a sending speed of 10,000 messages per hour, and that the groups that you created in the step above contain between 5,000 and 10,000 recipients. By scheduling the messages as indicated, you are taking advantage of your sending capacity and delivering messages between 8am and 9am to all recipients!