Users
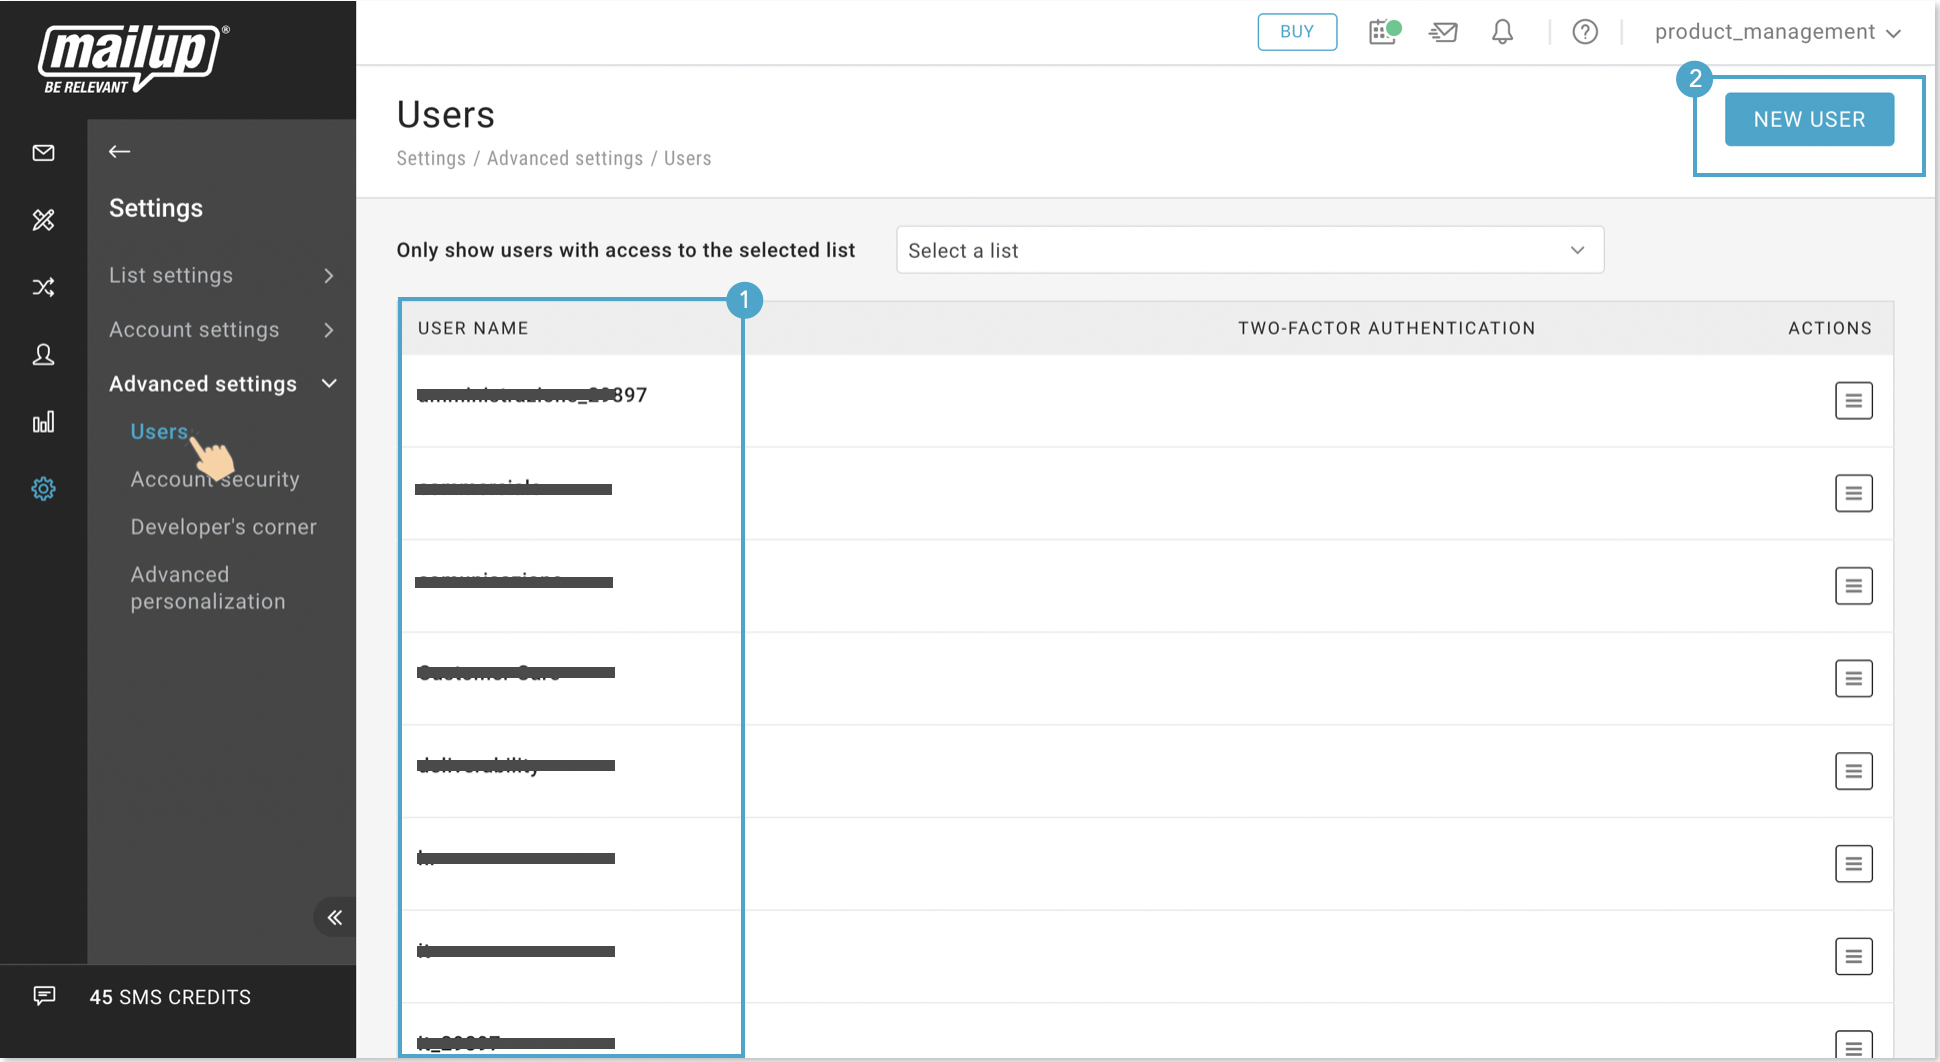
You can manage all settings related to users on the Users page and reach by following the path: Settings > Advanced settings > Users.
(1) User: On this page you can view all the users who have the credentials to use the platform.
(2) New User: You can create NEW USERS, as many as you have remaining users available in your plan.
(3) Only show users with access to the selected list: If you want to view the users who have access to a specific list, you can click the drop down menu and choose the list to view the users.

(4) Two-Factor Authentication: When platform administrator activates Two-Factor Authentication for the all/some users or users activate Two-Factor Authentication for their account, the status of Two-Factor Authentication is seen under Two-Factor Authentication column.
More information about Two-Factor Authentication please click here.

(5) Actions: You can take some actions related the users you have.
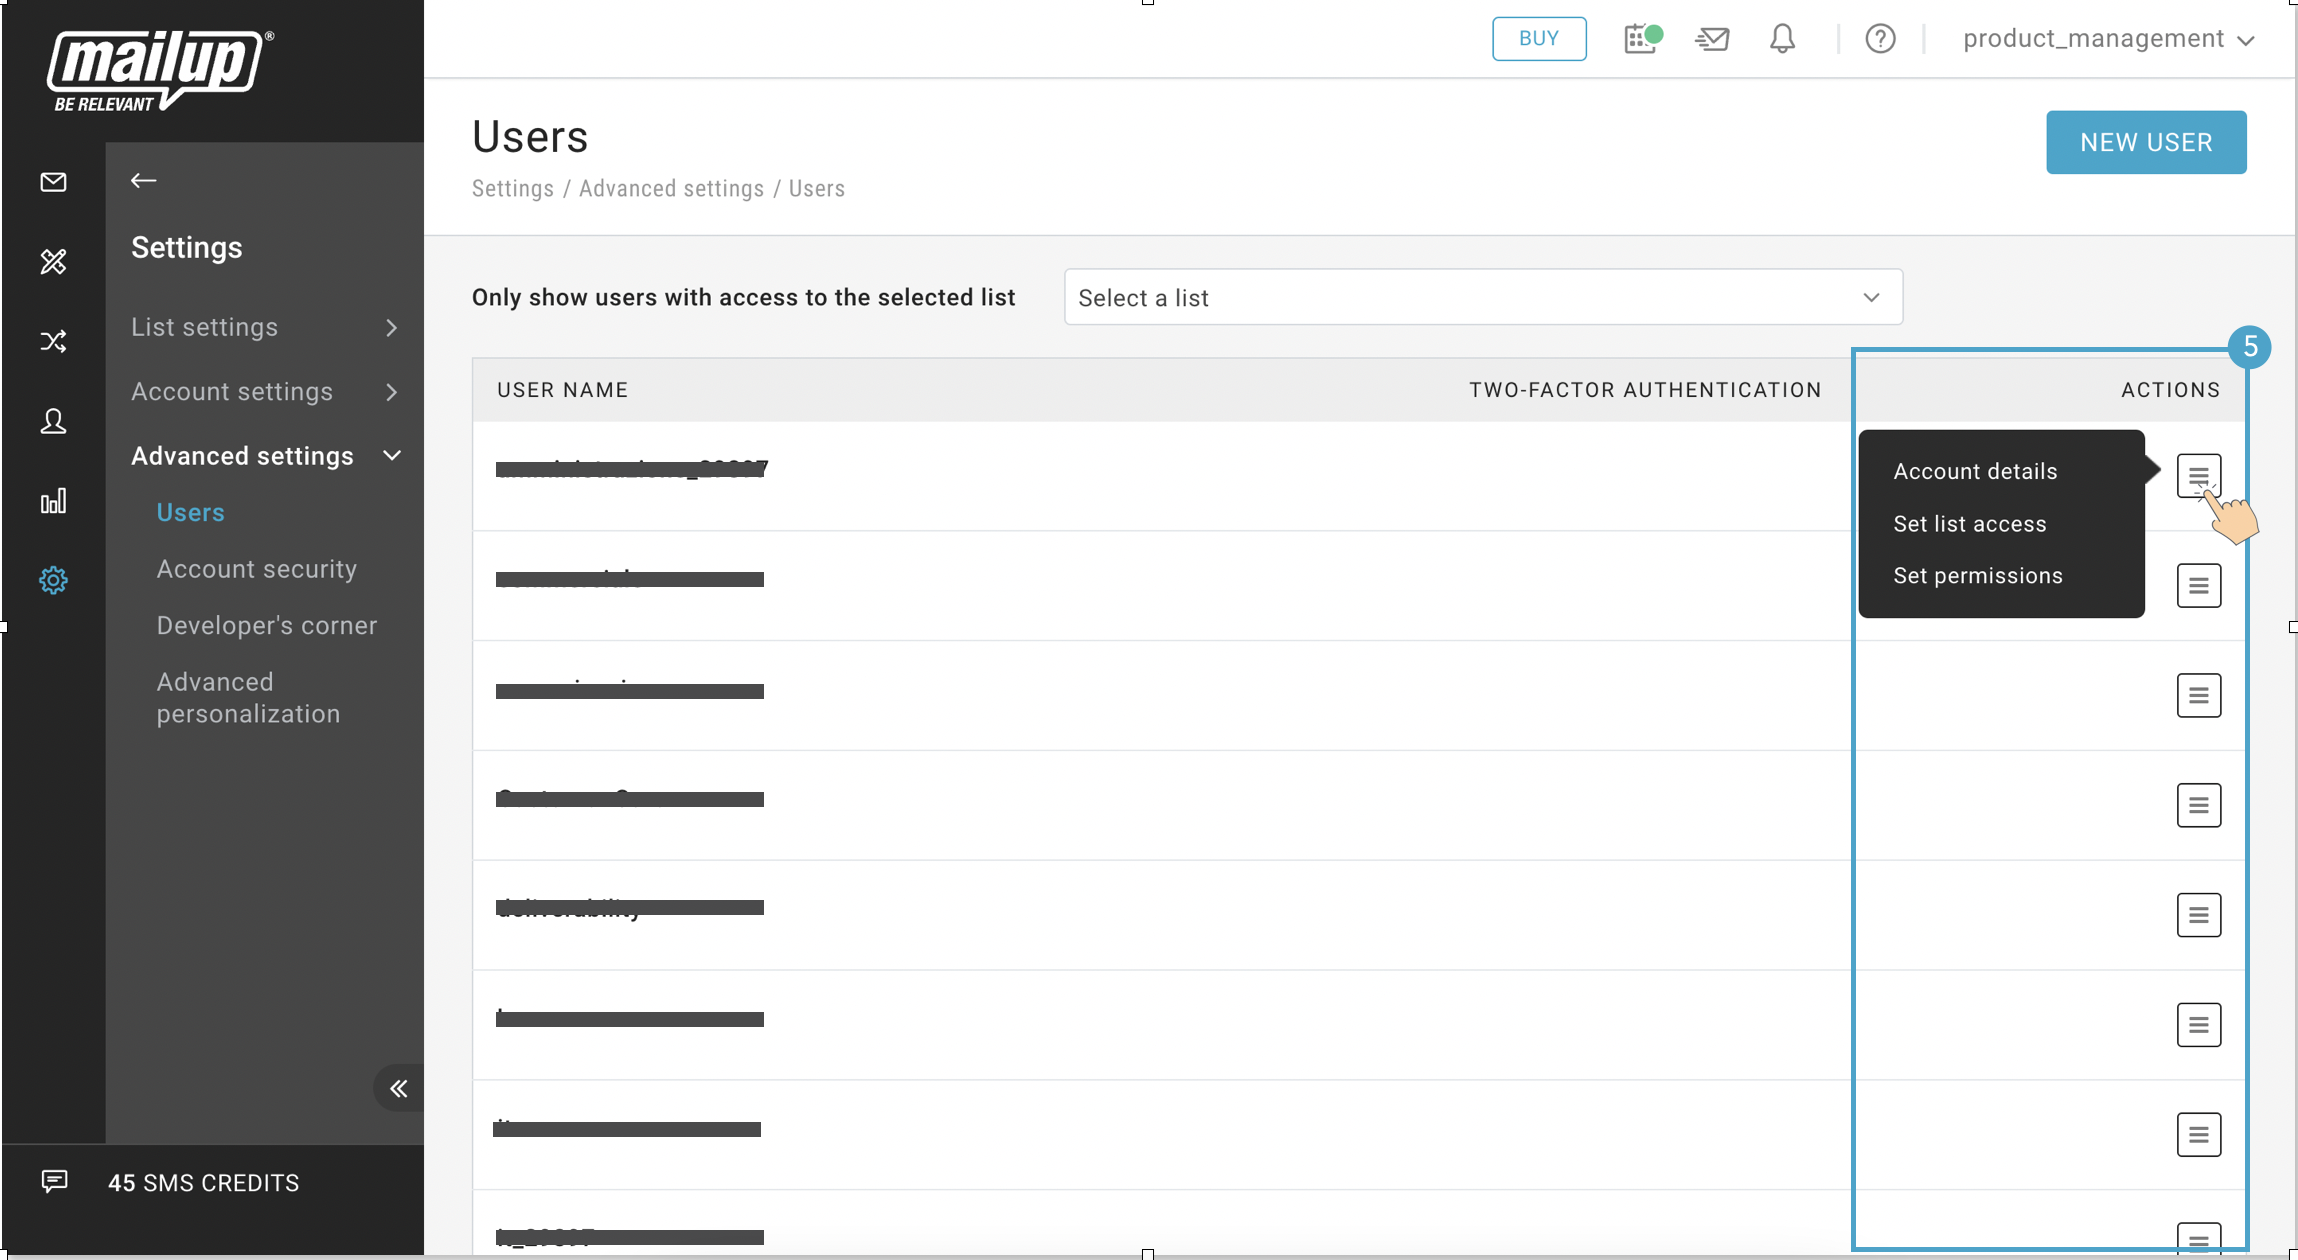
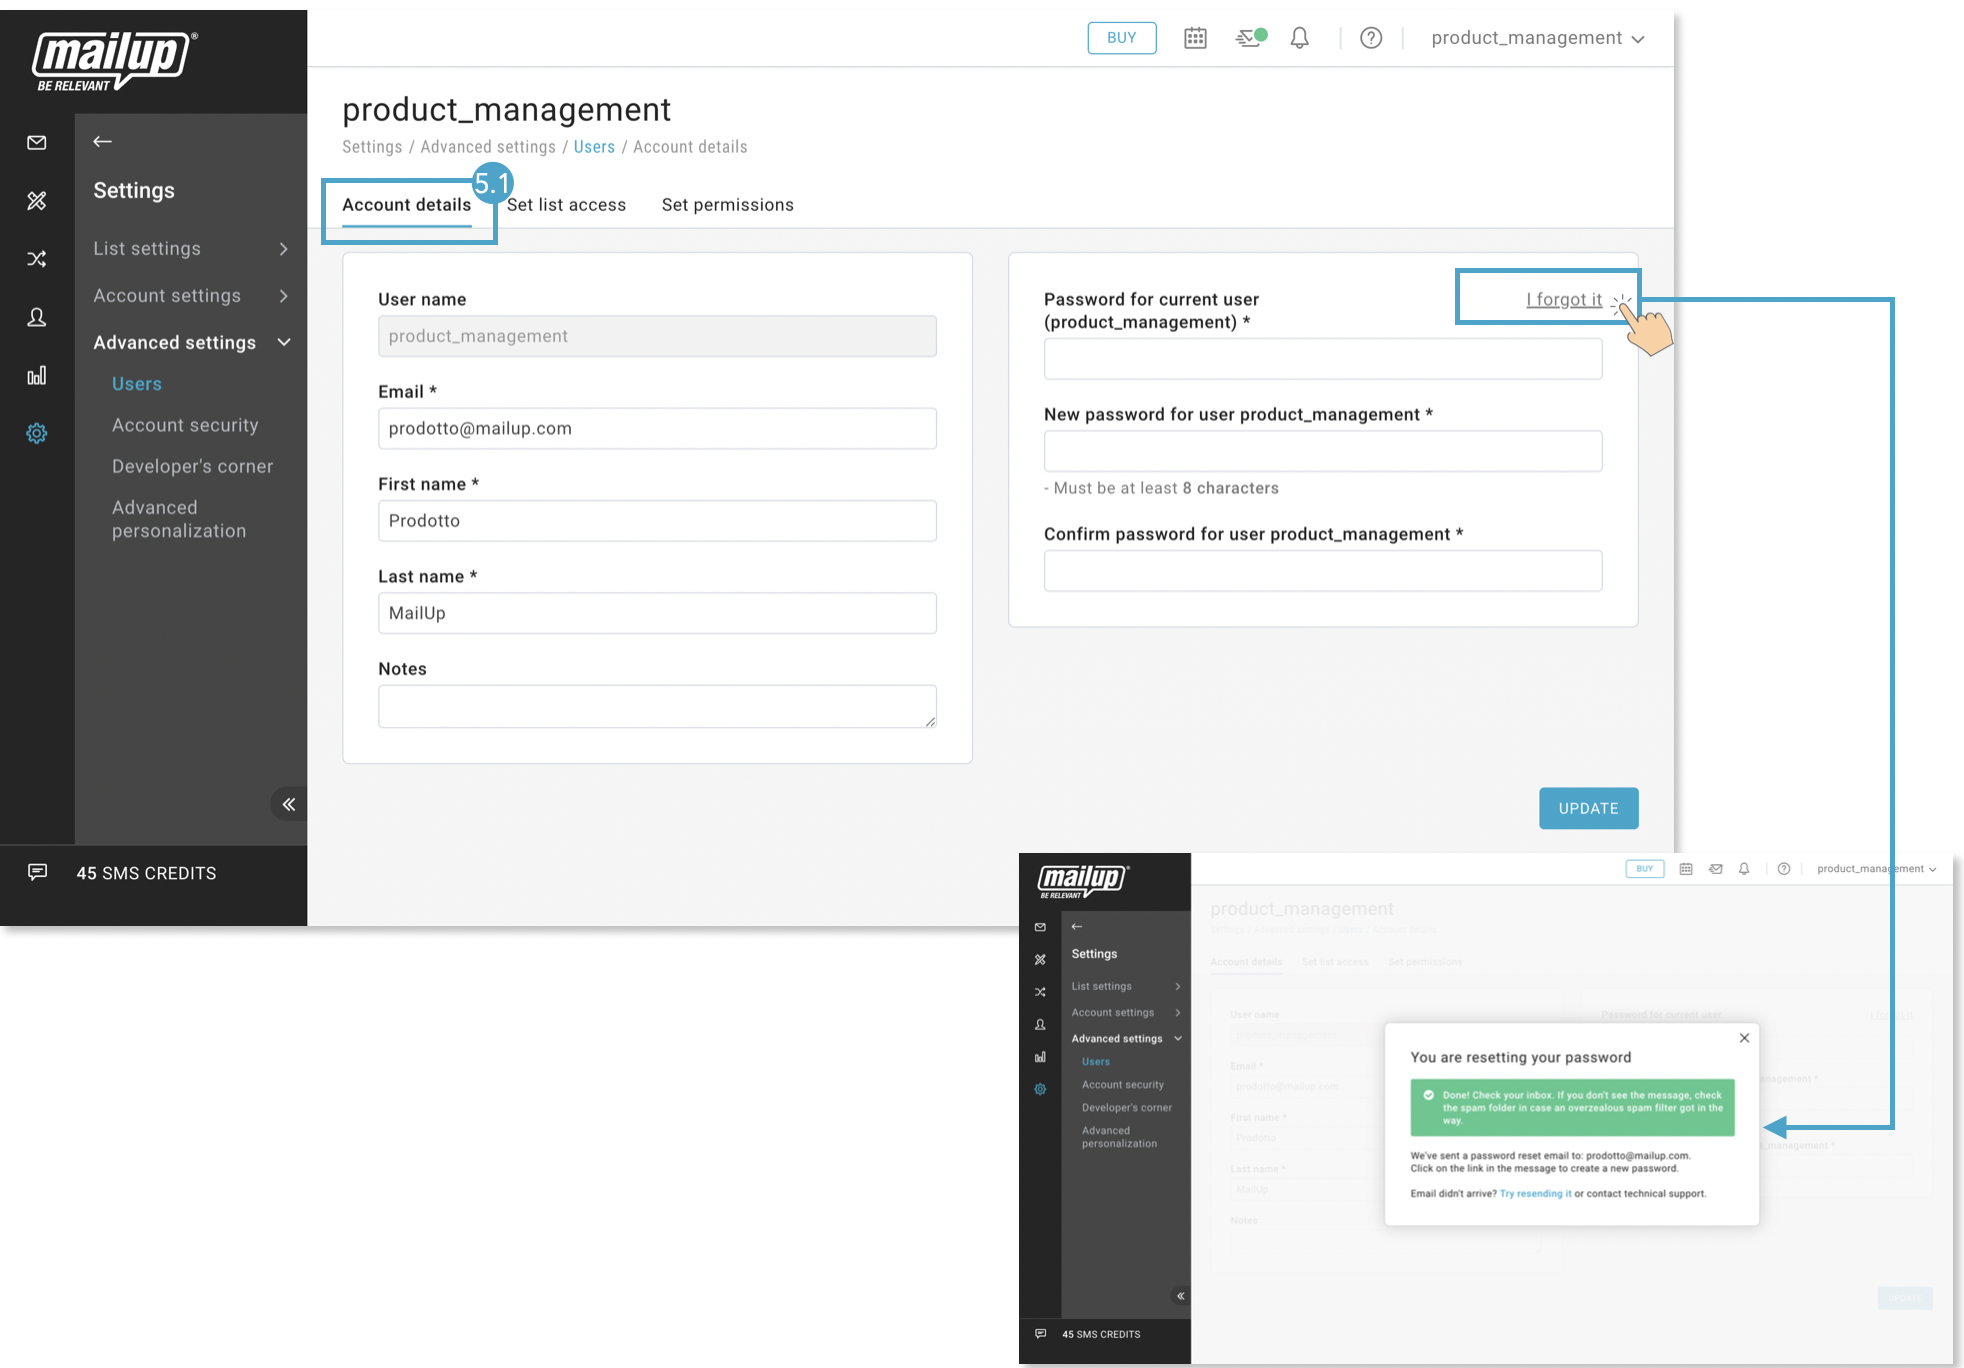
(5.1) Account details: Here you can see the details of each user. Additionally, here the password can be changed on this page by putting in your old password, setting a new password and confirming the new password. Then it is enough to click UPDATE button to save changes.
If you don’t remember your current password, you can reset it by clicking I forgot it link in the password changes area.
Attention: When changing your password, please take care to choose a strong password. More information about choosing a strong password please click here.
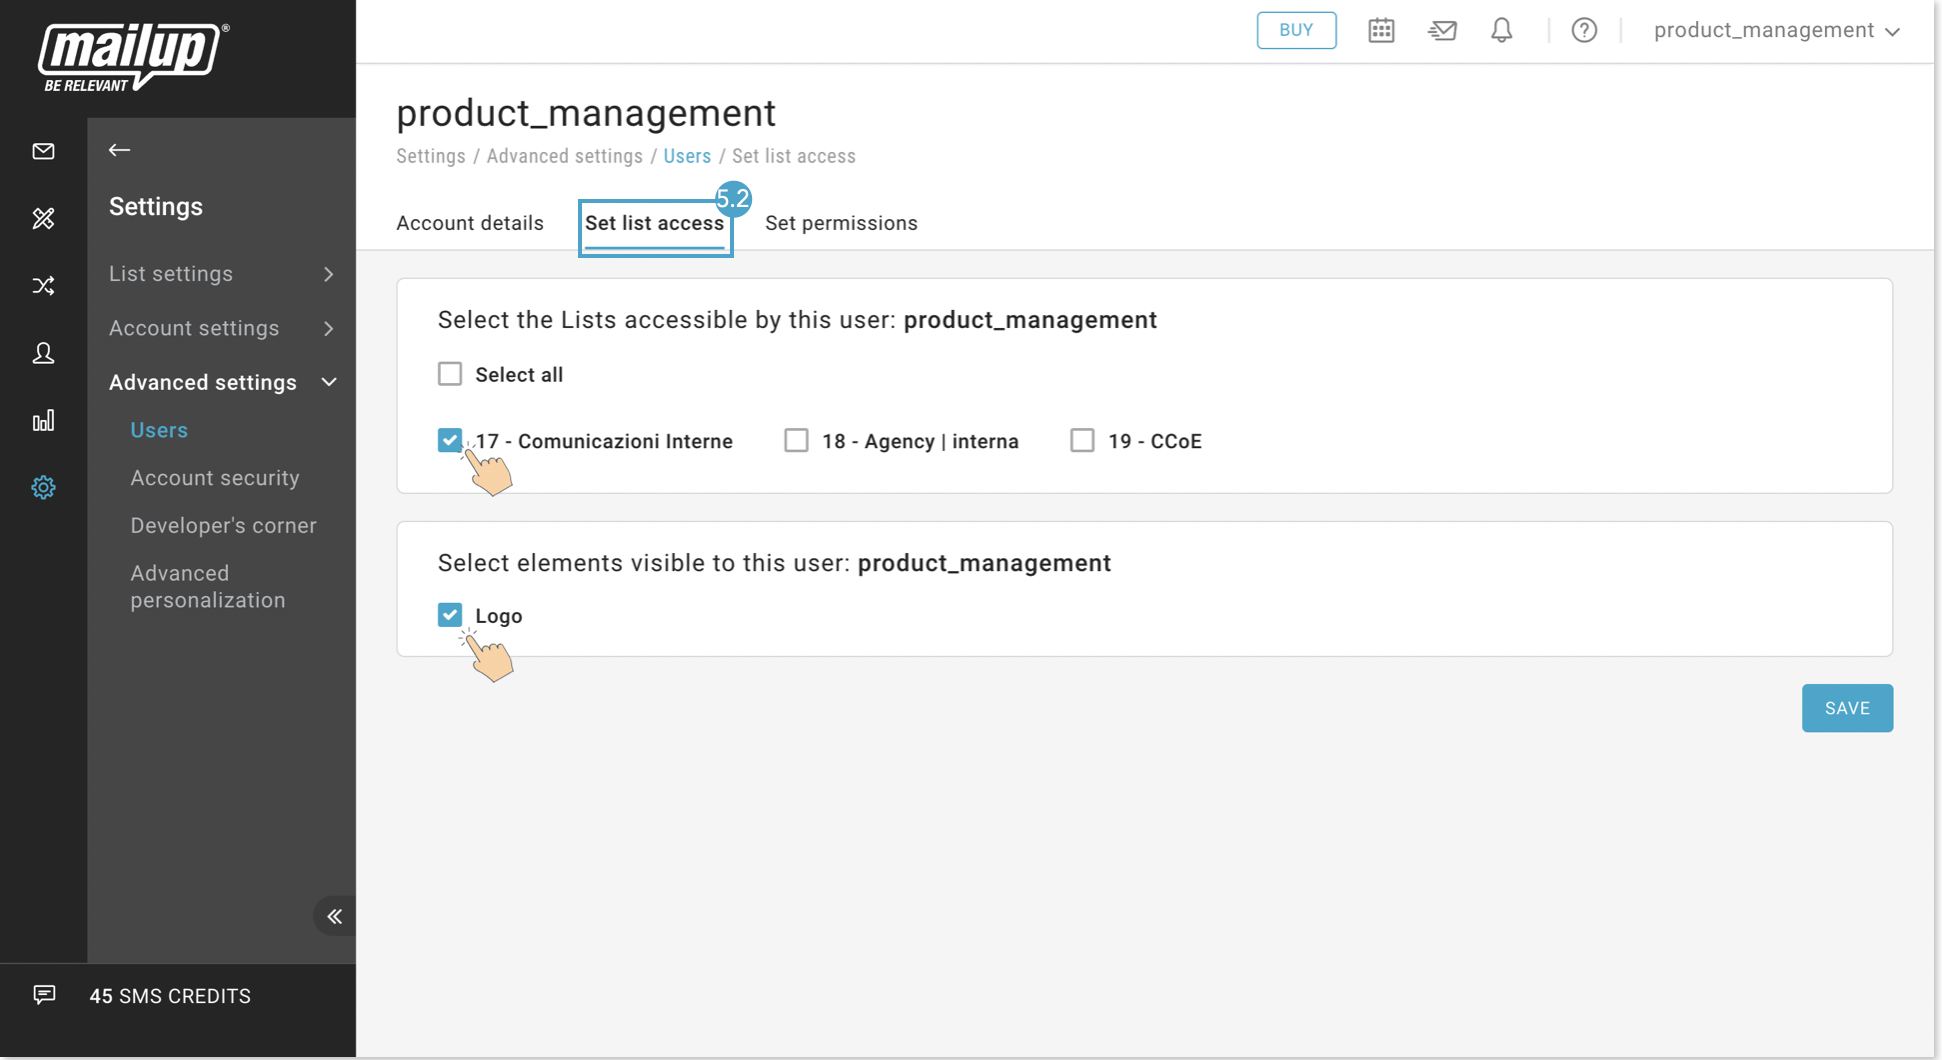
(5.2) Set list access: Here, platform administrators can give or cancel accesses to users to view the lists/elements and use them while sending campaigns. After making changes, it is enough to click SAVE button.
(5.3) Set Permissions: Here, the administrator manages page view permissions from here. After disabling the pages, it is enough to click SAVE button to save changes. For more information, please visit detailed page.
(5.3.1) Disable User: If you don’t want one of the platform users to reach the platform anymore, you can use the "Disable user" feature on the page. After marking the checkbox and saving the changes, the user can no longer access the platform.
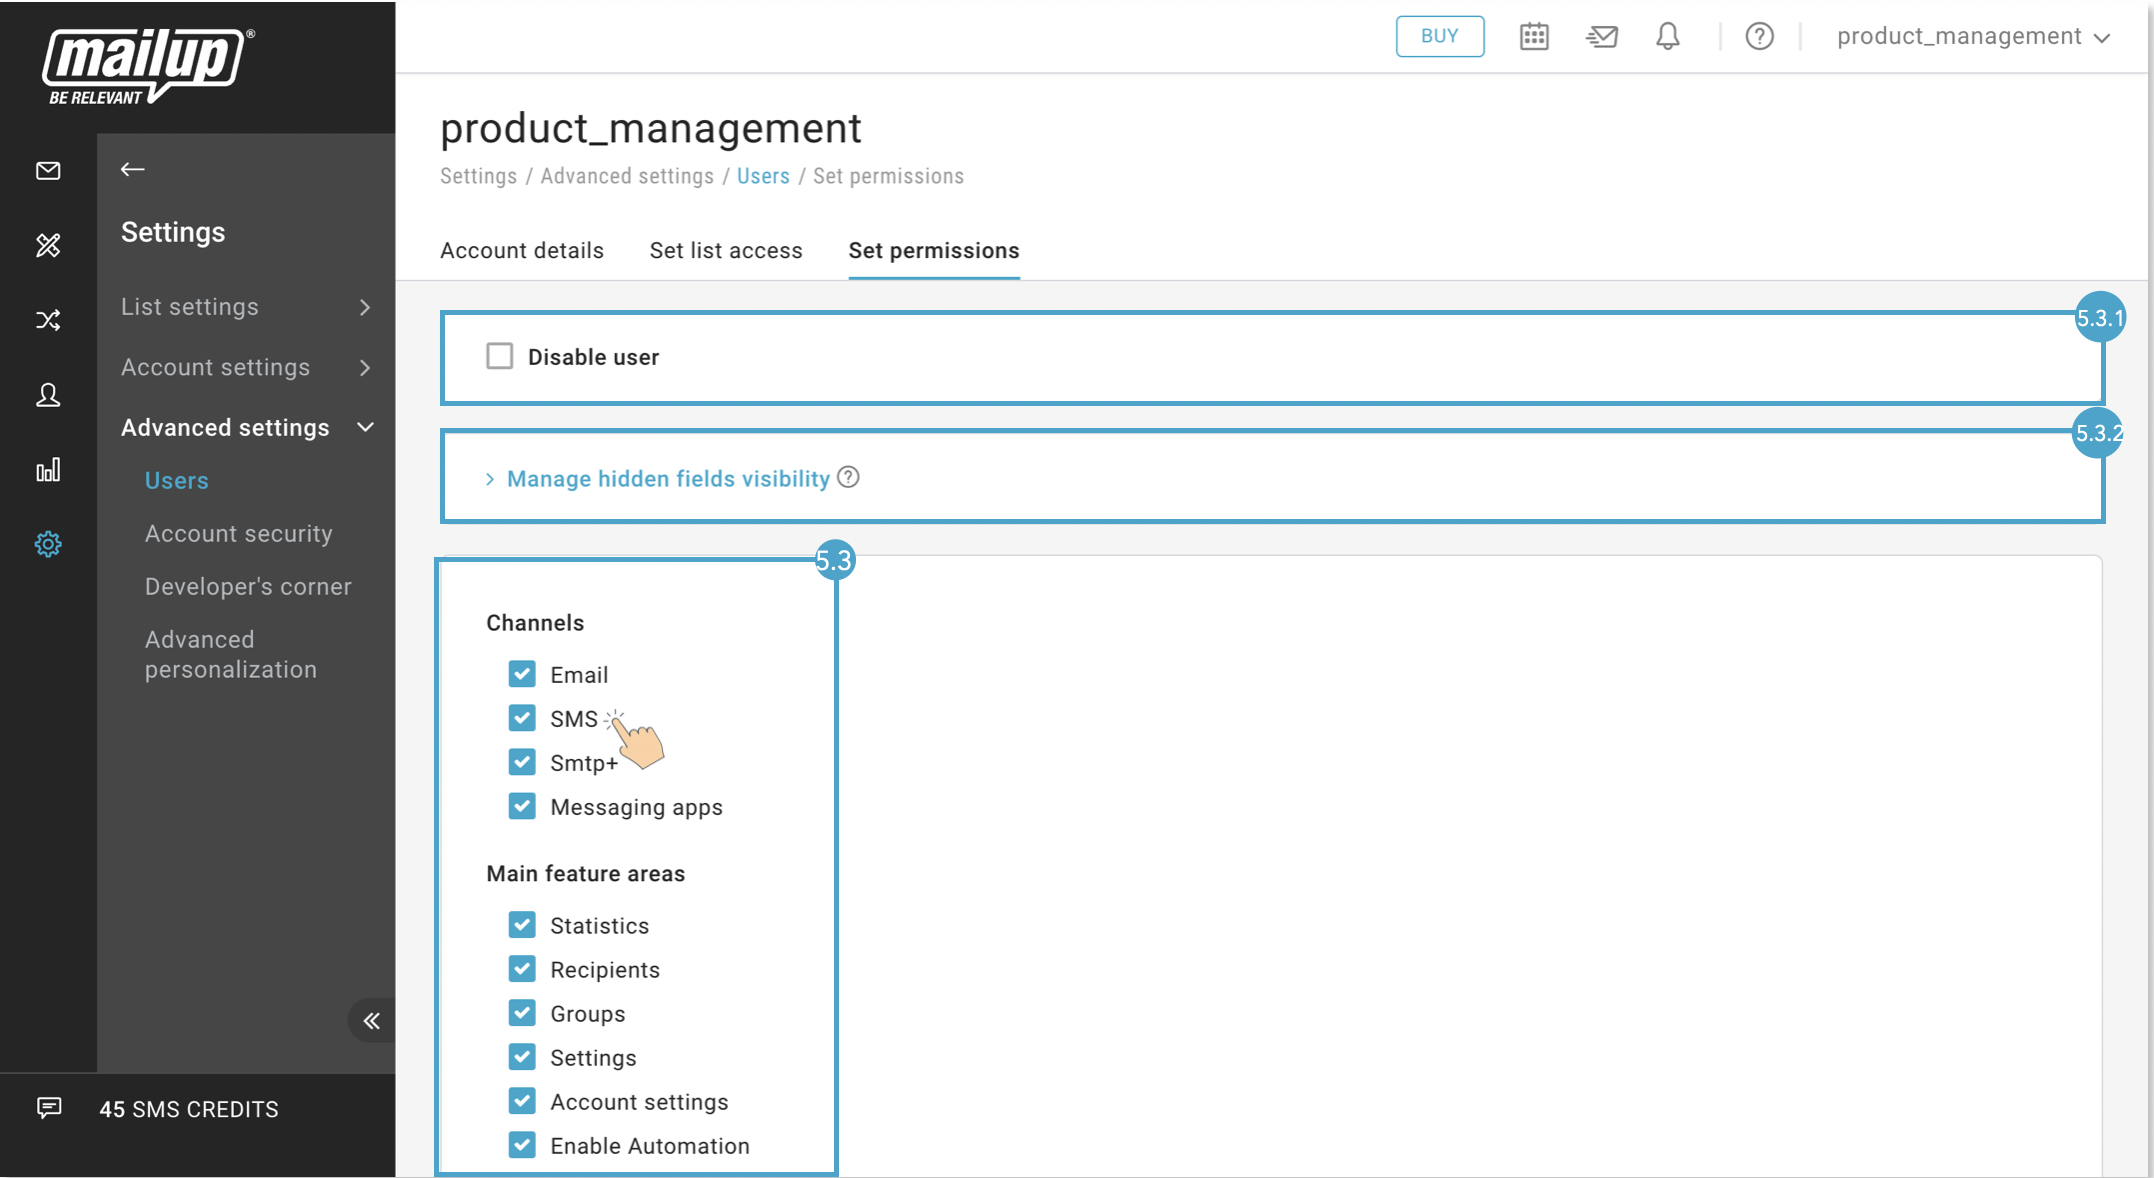
(5.3.2) Manage hidden fields visibility: Here, administrator can set which recipient fields that are marked as "hidden" will be visible to the platform users. If you are not seeing any fields here, first you should visit the “Recipient fields” page by clicking “here” on the “Manage hidden fields visibility” section.
On the Recipient files page, first you need to click Actions menu of related field then Edit to reach the pop-up to manage the hidden places.