Using background images in emails
In addition to setting a background color for each email section, you can also apply a background image to a message row.
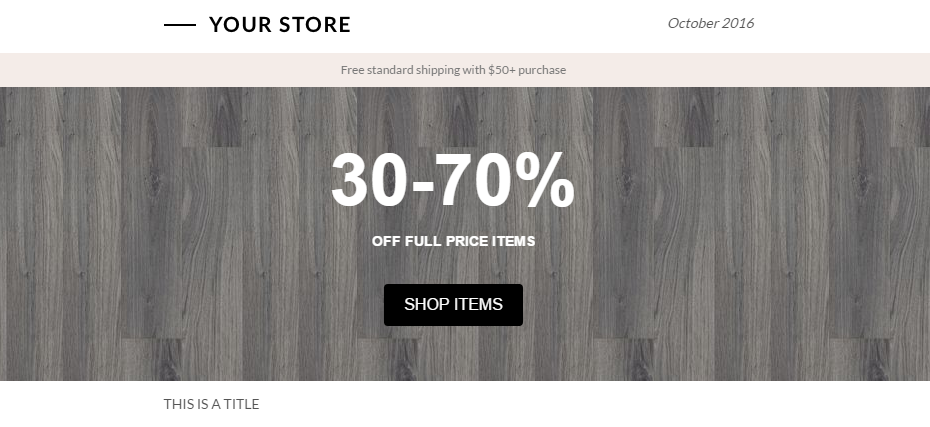
You could use a single background image that covers the whole width of the message (e.g. in the heading of the email) and add text and buttons to obtain a modern and eye-catching style.
.png?version=1&modificationDate=1476288150217&cacheVersion=1&api=v2)
In this email, we added some empty dividers below the black button to display the whole image in height.
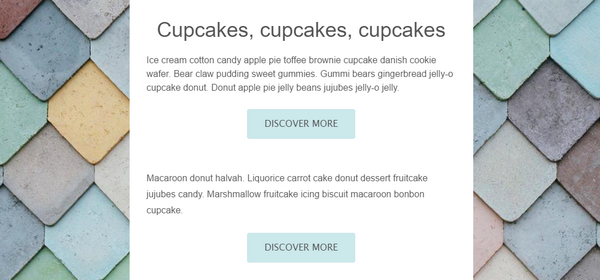
An alternative is to use an image as a row background, while keeping a solid color as the content background, like in this example.
Where to find it?
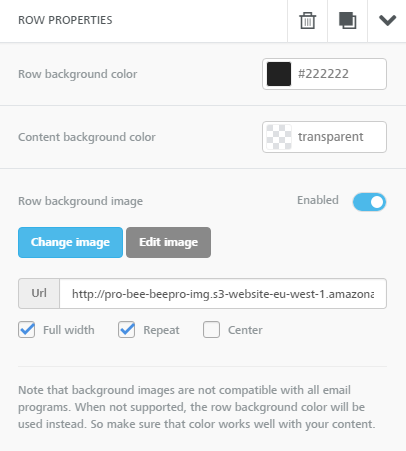
When you select a row in the design pane, you'll see that the "Row Properties" panel now includes a new "Row background image" section:
Let's look at the settings included in this section.
Selecting the image
Once you click to enable this feature, you can upload the image that will be used as background via the file manager by using the "Change image" button. Alternatively, you can copy and paste the image URL into the URL box if you wish to use an image hosted elsewhere.
Full width, Repeat, and Center
These three settings are important for aligning and finding the best fit for your background image or pattern within your message. Let's see how they can be used.
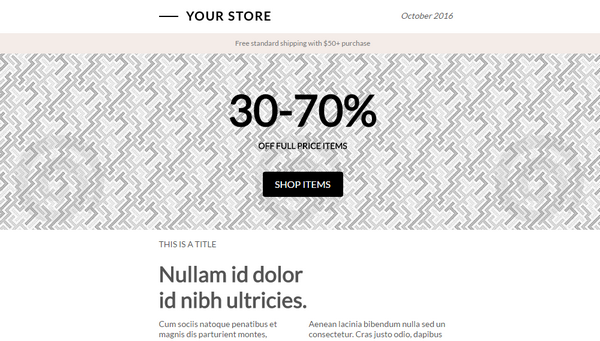
When you select Full width, the image is used as a background for the entire width of the row. This is an example of an image applied to the full width of a row.
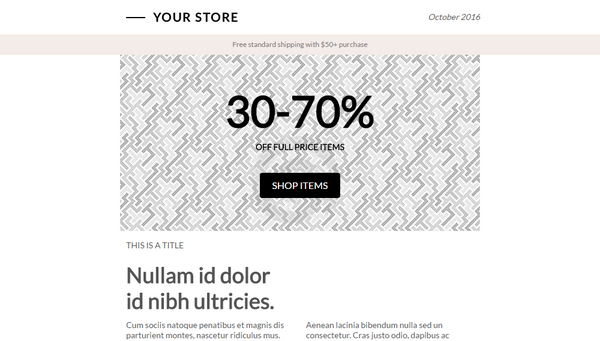
When not selected, the background image is applied only to the "Content" area. The width of the content area is set in the "Body" tab of the property panel.
Here is the same pattern applied only to the content area.
When Repeat is selected, the image is repeated. This works well with symmetrical patterns, repeatable to cover all the available space. Use "Fullwidth" and "Repeat" together if you want to repeat a pattern across the width of the row. If the row is higher than the height of the image, the pattern will be repeated vertically too.
When the Center is selected, the image is centered. If "Repeat" is also active, the image is centered and then repeated to the left and the right. If you "Repeat" without centering, the image is positioned in the top-left corner of the row, and then repeated to the right.
All three settings can be enabled and disabled independently of each other. Try uploading a small image and playing around with them to understand how the positioning of the image is affected.
Email client compatibility
The BEE editor uses advanced email design techniques to ensure that background images are rendered on most email clients. According to our most recent tests, the only email clients for which background images were not shown, were:
- Outlook for Windows (from version 2007 onwards)
- Outlook 2016 on Mac
- Lotus Notes 7
- Xfinity / Comcast email client
For those email clients - and best results when images are blocked - make sure that you set a background color for the row that works well in the absence of the background image.
Image resizing
To make the system more compatible with the row background image feature, a few other changes were introduced.
- Images are uploaded at their native width if their width is up to 1920 pixels
- Images larger than 1920 pixels are resized to 1920 pixel width
- All images, regardless of their width, are automatically optimized without quality loss
- The size limit for image uploads has not changed (maximum 5Mb per file).