Manage groups
Group vs List
MailUp platform is divided into Lists, which are an independent set of messages, settings, statistics, filters, events, groups, subscribers, unsubscribed recipients, etc.
You can create multiple Lists in the platform, as long as your account has purchased that feature and as long as your user has rights to do so.
Groups are a static segment within a List. Therefore, Groups are always a subset of the recipients that exist in a List. A group can be created or deleted at any time and the contact information that it contains will not be affected. A group will only be assigned to one List and will not be automatically assigned to other Lists in your account.
Glossary
Recipients: Contacts in your admin console. There are three recipient statuses: Subscribed, Pending, Unsubscribed. They will only receive messages from you if their status is that of a "Subscribed".
Lists (or Environments): A List - also referred to as an Environment - is an independent set of messages, settings, statistics, filters, events, groups, subscribers, unsubscribed recipients, etc. You can create multiple Lists in the platform, as long as your account has purchased that feature and as long as your user has rights to do so. Groups are a static segment within a List. Therefore, Groups are always a subset of the recipients that exist in a List.
Groups: Groups are a subset of recipients (typically subscribers) within a List. Recipients can belong to multiple groups (similarly to “Categories” in MS Outlook). A group can be created, edited, or deleted at any time. The recipients that it contains will not be affected. When importing recipients, you can specify one or more groups that they should be assigned to. Groups are List-specific: they will not be visible in other Lists. Unlike filters, Groups allow you to create static segments of recipients. If a recipient is added to the Group "Subscribed on Facebook", the recipient will stay assigned to the Group until removed.
Tip
To segment your subscribers, use Groups. While importing contacts you can assign them to various groups.
Create different Lists, instead, to manage them separately. As said, a List is an independent Environment with its own set of messages, settings, statistics, groups, etc. and should be used for different type of communications (i.e. different products or clients for an agency). Use different lists if you communicate in various languages.
Warning
A common error is to create a list for each email campaign. Please note that creating a new list each time is time-consuming for you and potentially dangerous as the platform in this way does not recognize unsubscribed.
Managing Recipient Groups
Groups can be created to segment recipients based on any type of criteria: sending activity, profile demographics, filters, etc. to create more targeted messaging.
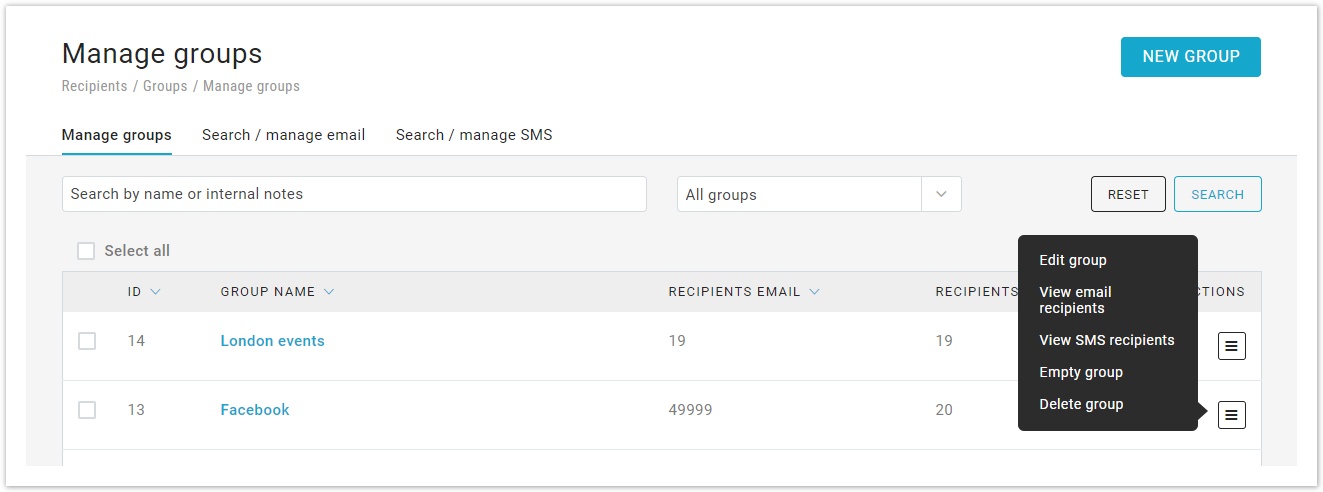
The Groups page allows searching a group by name or internal notes. In this page, you can - through the Actions menu or by selecting two or more groups:
- look for a group,
- create a new group,
- rename a group,
- view the number of recipients within the group
- delete a group to delete the selected groups: recipients are not affected, other than the fact that they will no longer be assigned to that group since it is being deleted.
- delete recipients to completely remove from the system the recipients that are currently assigned to the group. Make sure you understand the difference between unsubscribing and deleting a recipient. Typically, you will want to unsubscribe, rather than delete a recipient.
- delete group and recipients to delete both the selected groups and all the recipients currently assigned to them. Once again, make sure you understand the difference between deleting and unsubscribing a recipient.
- empty group to remove all recipients from the selected groups. Those recipients' subscription preference is not changed. What's modified is simply their assignment to the selected groups: they will no longer be assigned to that group.
Create a New Group
To add a new group, go to Recipients > Groups, click on the New Group button in the bottom right corner. A pop-up form will ask you to insert the Group name and internal notes to better identify the group.
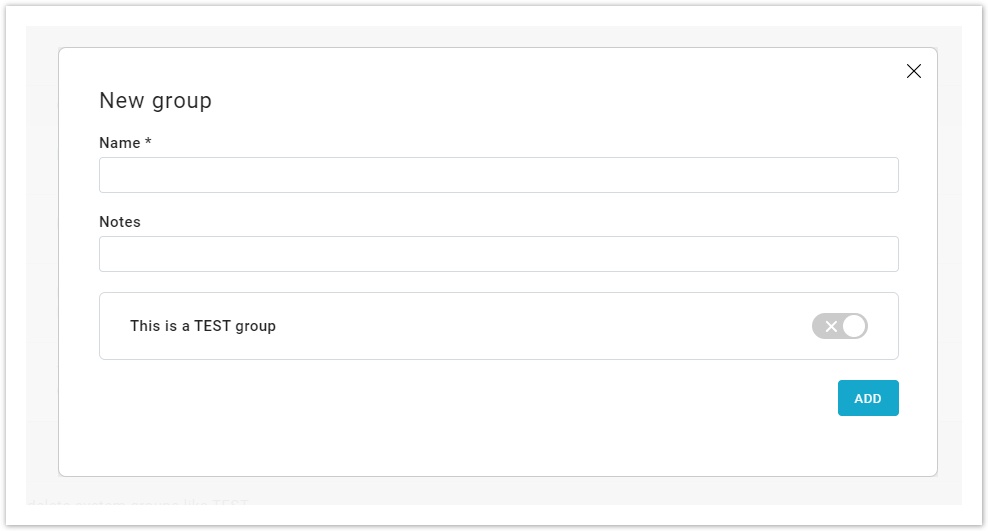
Test group
When creating a group, you can flag it as a "test group". By doing so, you can select it within the campaign setup wizard when choosing the "send to test group" option. Moreover, you can include or exclude test groups when searching for groups inside the "Groups" page.
Viewing recipients in a Group
Click on the Actions menu on the right and select View email recipients o View SMS recipients, a new page with the subscribed list will show up.
You can access to this feature also through Recipients > Email or SMS, by choosing the selected group in the "Include groups" tab.
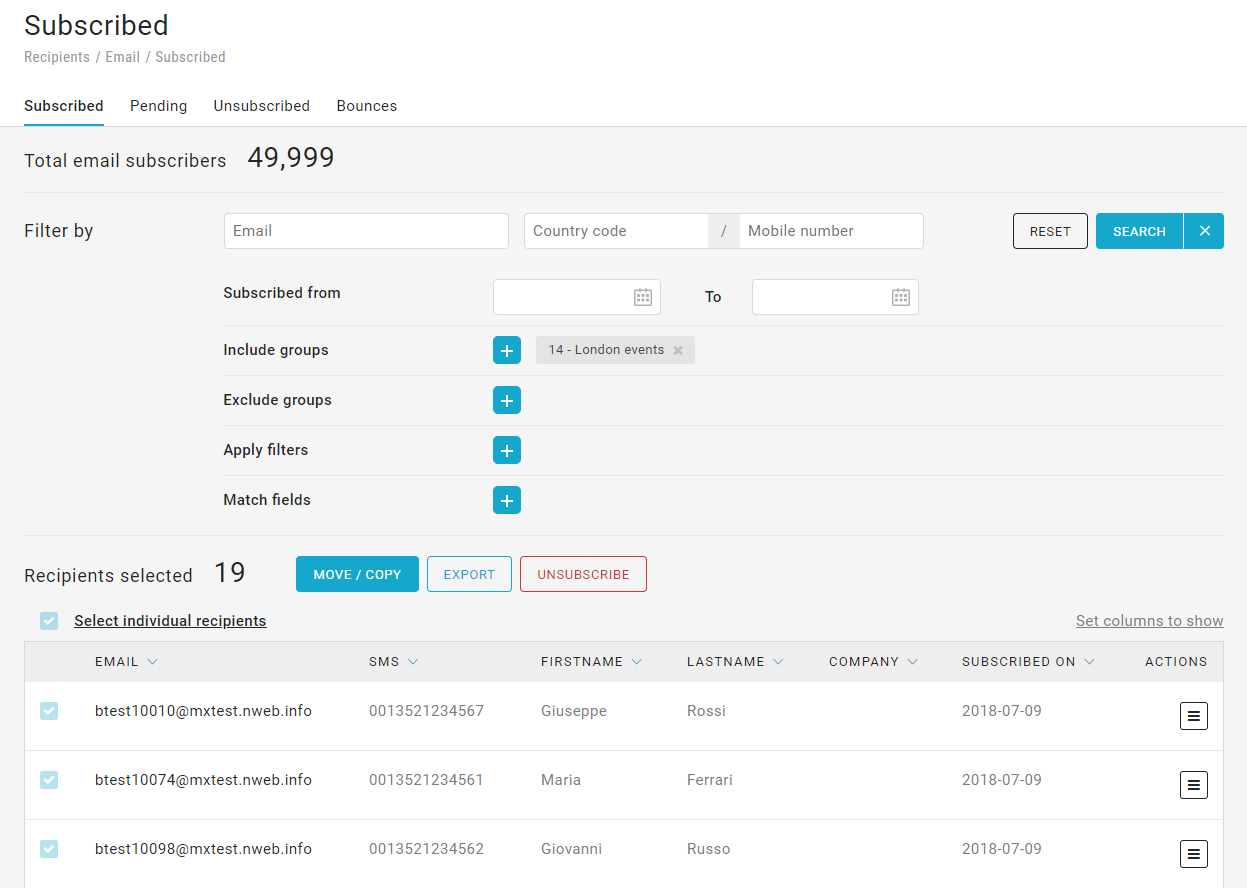
Here you can look for recipients included in a group and apply a filter if needed.
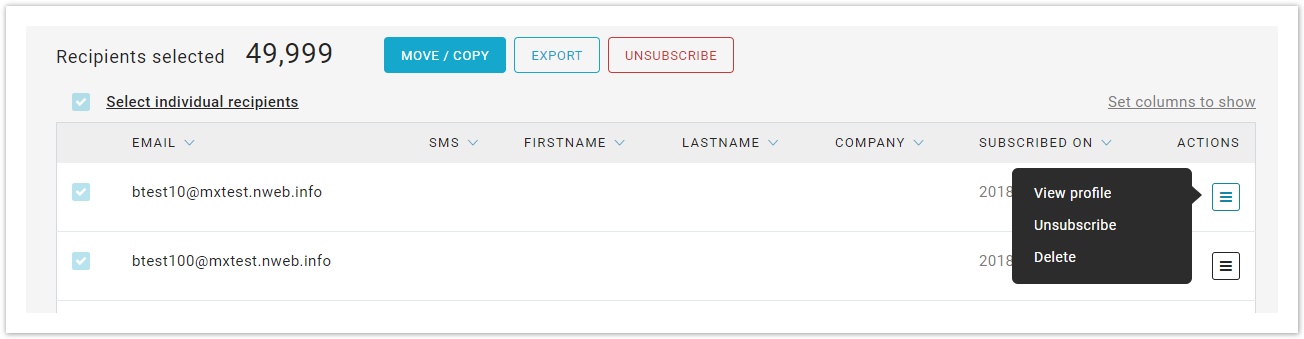
To modify the status of an individual recipient, click on the Actions menu and select View profile, Unsubscribe or Delete.
The recipient status (subscribed or unsubscribed) is associated with the list, this means that a recipient can be unsubscribed in a list but not in another one. Also, you can insert a subscriber to more than one group.
Move, remove or unsubscribe recipients from a group
Click on MOVE / COPY button to manage previously selected recipients.
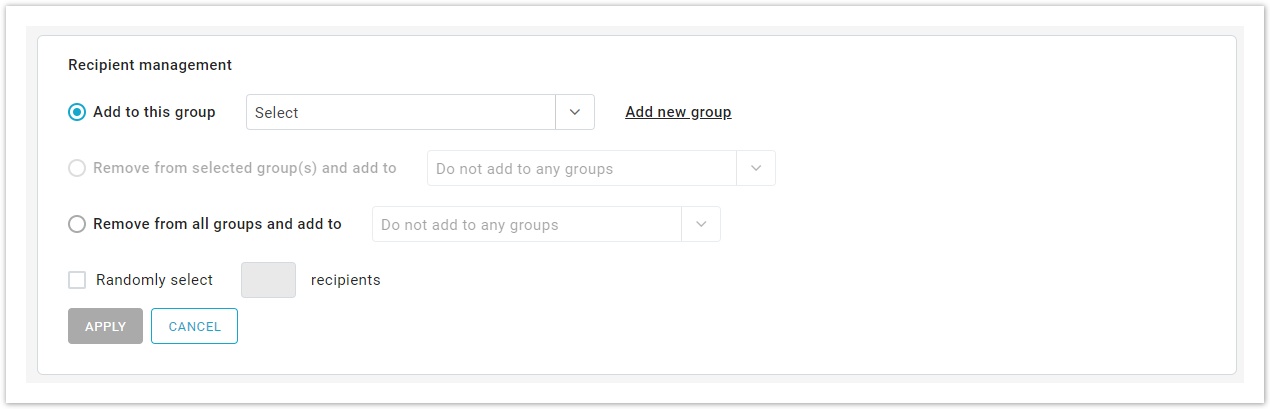
For example, you can:
- add recipients to a group
- remove recipients from selected group(s) and add to another
- remove recipients from all groups and add to another
- remove recipients from selected group(s)
Finally, you can also unsubscribe or start and export process.