Uploading content
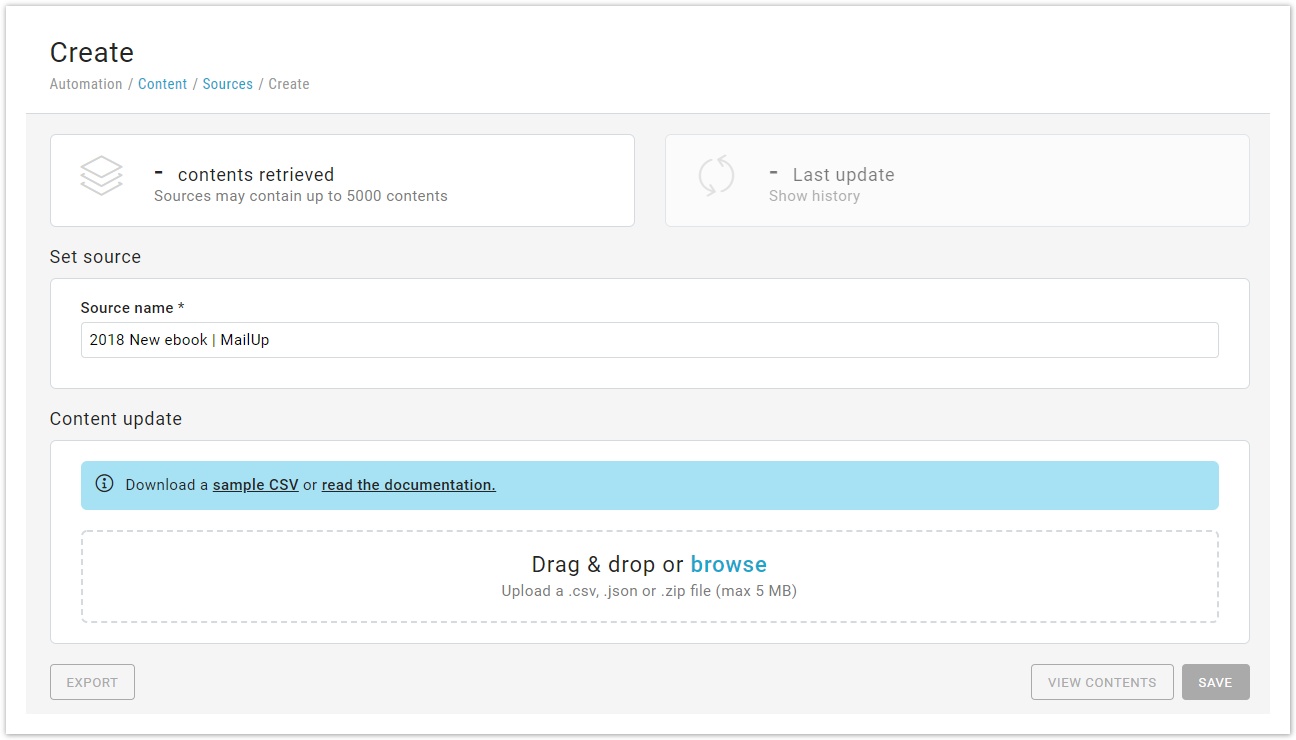
To insert a new source:
- Insert Source name
- Upload a .csv, .json or .zip file (max 5 MB) by choosing to "browse" or drag & drop the file
How to set the .csv file?
The .csv file must contain the following items:
- Title: content title
- Summary: content short description
- Image: link of the image, hosted on your website, to be retrieved
- LinkURL: main URL, where is the content itself
- LinkText: text link
- ContentDate: publishing date or a date you want to associate to the content
- ContentKey: keyword to identify each content (it can be used to update an existing content or in the search bar in the page View contents)
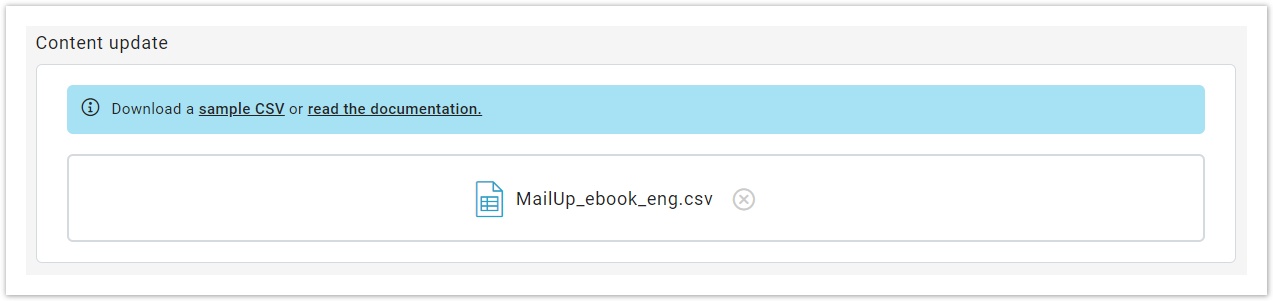
Here below an example of a .csv file >> MailUp_ebook_eng.csv
Some useful tips:
- If you don't have all the items listed above or you prefer to not insert some of them, add two double quotes. The platform will automatically fill in this info.
Title,Summary,Image,LinkURL,LinkText,ContentDate,ContentKey
Email marketing summer guide,"4 Tactics to Freshen Up Your Summer Email Campaigns","https://lp.mailup.com/it/wp-content/uploads/sites/2/2016/07/Cover-Summer-2016.png","https://lp.mailup.com/it/guida-campagne-email-estate/","",2017-06-20T12:30:00Z,""
- Use double quotes to include long sentences that may include punctuation "Check out 15 top-notch email marketing examples, - and learn what makes them so effective"
- Choose CSV format while saving the file.
- Launch Notepad to check if the saved file contains any misspelling or too many double quotes.
To know more about .csv format take a look at this page.
Once uploaded the file, click on Save button.
MailUp will automatically retrieve available content and display, on the top of the page, number of contents retrieved, last update date and time. Click on "Show history" to view updates history.

Each source may contain up to 5,000 contents.
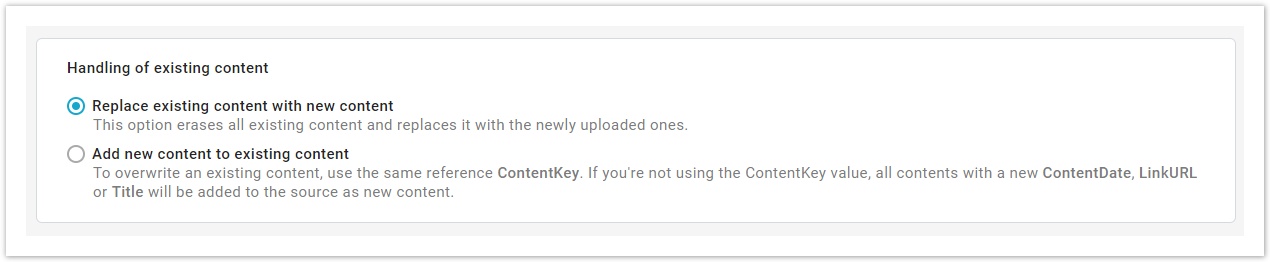
Now that you have imported content in you have to decide how to handle them. Choose if you want to:
- replace existing content with new content. This option erases all existing content and replaces it with the newly uploaded ones.
- add new content to existing content. To overwrite an existing content, use the same reference ContentKey. If you're not using the ContentKey value, all contents with a new ContentDate, LinkURL or Title will be added to the source as new content.
Once selected the way to handle existing content, you can:
- export content in .json format,
- view contents,
- save.
How to upload a new file in a source:
Choose the source you want to modify in the list page (Automation > Content > Sources) and select "Edit" from the Actions menu.
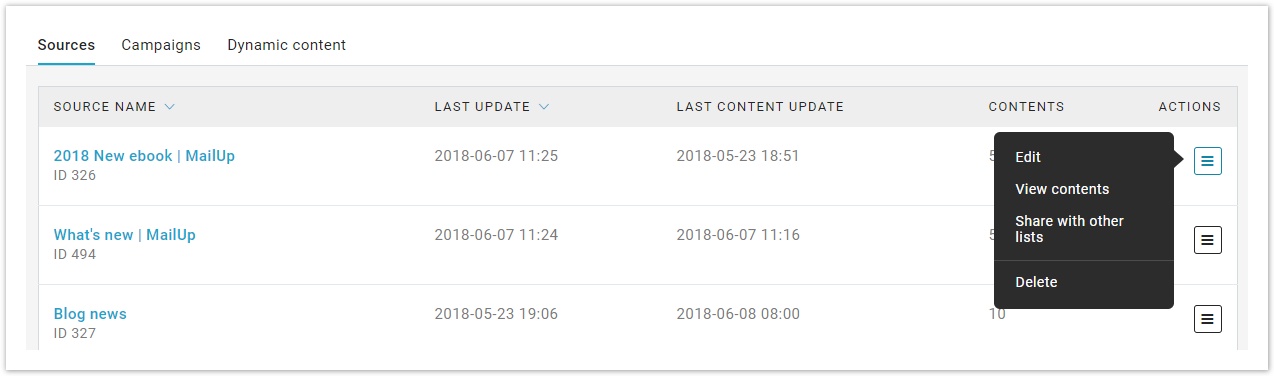
Upload a new file by choosing to "browse" or drag & drop it and then select "Save".
If, after having uploaded a new file, the save button is disabled, make sure you have selected one of the radio buttons to handle existing content.