Download your plugin from the following URL: https://login.salesforce.com/packaging/installPackage.apexp?p0=04ti0000000AlPi (version 1.23)
...
To use your connector you will need some further configurations to happen.
Customize pages as MailUp: Set up sections and fields.
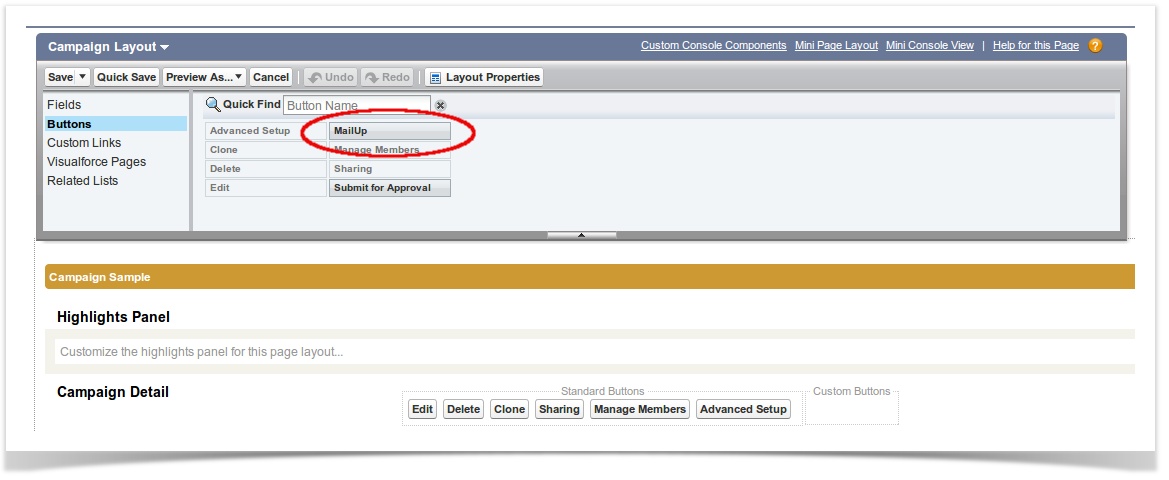
1) Select your Campaign layout and add Access the Campaign PageLayout: at the left column of your Salesforce console, select Build > Customize > Campaigns > Page layout. To create a MailUp section, click Edit and select the MailUp button (already available in your fields and buttons lists): to do so select the MailUp button and drag . Drag it to the custom buttons area under in the Campaign Detail section and save (at the upper left corner.)
2) Create a new section in your Campaign PageLayout, named MailUp,
...
Click on Edit, and select the Section button and drag . Drag it to the area you want the MailUp section to appear (normally below Campaign Details section.)
...
Name the section MailUp and select the 2-column option. (The tab-key order option is up to you.)
Now, create the following fields by dragging and dropping these buttons into the new section you've created and save. (See image below):
- MailUp total views
- MailUp total clicks
- MailUp total bounces
- MailUp total unsubscription

3) Create a similar section in your CampaignMember PageLayout and drag the four buttons and save.Follow the same process in your CampaignMember PageLayout section (Build > Customize > Campaigns > Campaign Member > Page Layout.) Create the MailUp section by dragging the Section button into the Campaign Details section, name it MailUp and save.
Create the various fields, again by clicking and dragging into the MailUp section you created:
- Views
- Clicks
- Bounced
- Unsubscribed
...
Console and fields mapping
Map your MailUp console with your Salesforce organization from the new tab Configuration.
Add the follwing following data, click on Save and then on Activate console:
ConsoleID: unique identifier of your console, usually it is a combination of 5 numbers (e.genter your MailUp account ID without the "m" (eg: 12345)
MailUp Username della console MailUp: userID, usually it has the same number combination of your consoleID and the letter m in front of it with the letter "m" (e.g: m12345)
MailUp Password della console MailUp: enter your MailUp console password
Endpoint URL: the MailUp console URL (e.g.: http://b0x5a.s42.itnet, eliminate the end code - from the " / " onward.)

| Warning | ||
|---|---|---|
| ||
You can only associate 1 MailUp console with your Salesforce organization and this will be linked with 1 List only. Any group or message that will be imported from Salesforce to your MailUp console will be available in the appropriate area of this list. |
...