...
How to create a new Task
...
| title | Info |
|---|
...
As a general rule it is recommended to:
- set up a new
...
- Task
...
- Simulate sending
...
- Activate it when the simulation is successful
The creation of a task is divided into 4 sections.
- General information, which is the top section of the page
- Activation Frequency
- Condition
- Action
General information
On the top area of the page, you can specify:
...
Activation Frequency
Next, specify the frequency with which the system will check whether the action specified later in the "action" tab should be performed.
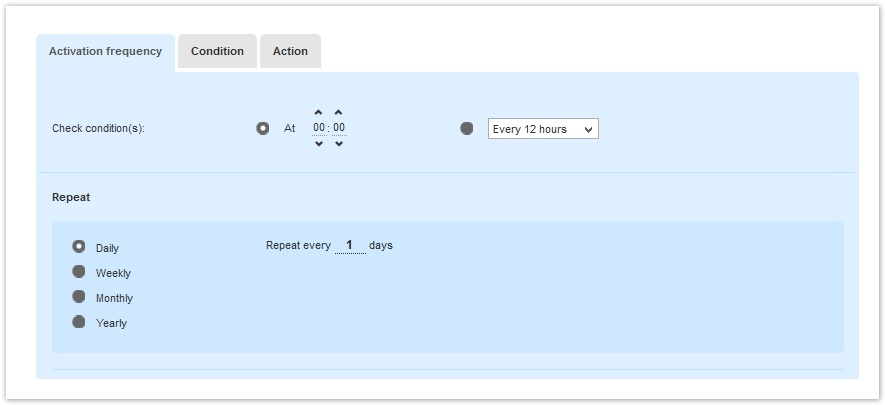
Check conditions: at a specific time (e.g. at 0.00) or every 4, 8, or 12 hours
Repeat: let the platform repeat Check conditions daily, weekly, monthly or yearly.
| Note | ||
|---|---|---|
| ||
| If you're setting up a triggered message, frequency refers to the interval at which the triggered message is run. You are not setting how often the message will be sent. You are indicating how often you wish the system to check whether the message should be sent. The message will then be sent if the event it triggers occurs. That is: if the conditions that you specify under the Condition tab are found to be true. |
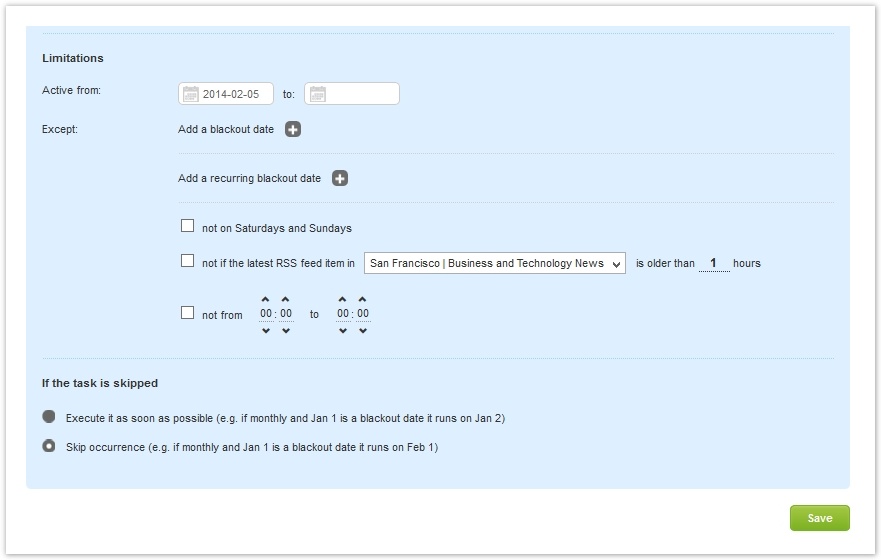
With Limitations you can set the limitations to the Check condition and Repeat previously set:
- Active from: you can set your task so that it runs only within a certain period of time (e.g. from the 12th to the 25th December)
- Except: you can add a blackout date (e.g. December 25th where you don't want your recipient to get any messages) or a Recurring blackout date (e.g. you can prevent triggered messages from being sent during the weekend)
- If the task is skipped: if any of the limitations you set occur you can set when to execute the automation (e.g. if monthly and Jan 1st is a blackout date it runs on Jan 2nd)
Condition
...
distinct steps and a final summary step. Below we will guide you through the creation process:
| Anchor | ||||
|---|---|---|---|---|
|
...
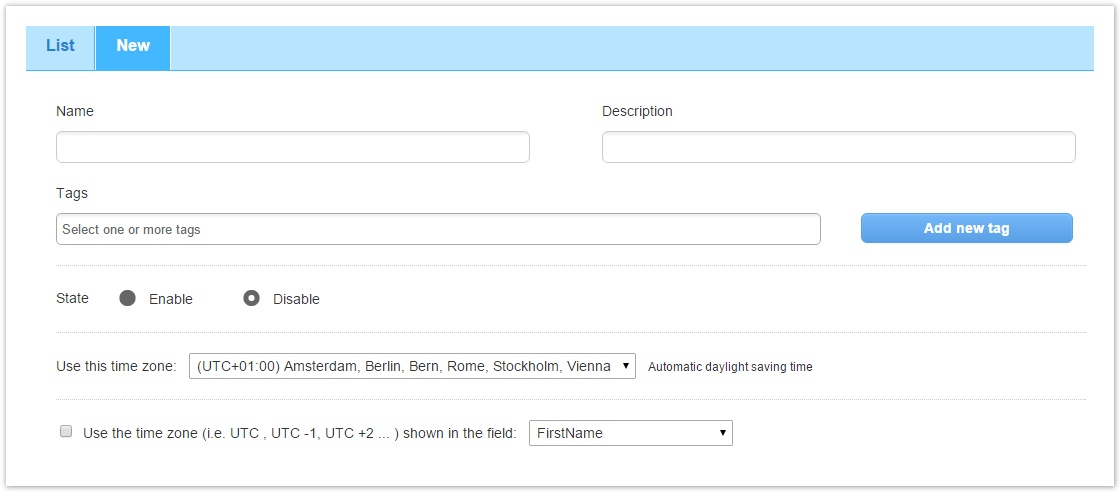
General informations
In this section you will find the possibility to assign:
Name of the task, which will identify it and will be displayed in the list
Description of the task, which you can use to remind yourself how it works and in which cases it is useful to you
Tag, which will help you find this specific Task if you have created many
Default time zone, to establish the reference time zone for your task
The ability to use the time zone contained in a personal data field.
| Warning |
|---|
Use of time zone from personal data field The value contained in the field must be written in a specific format, following these examples: UTC+00, UTC+01, UTC+02, etc ... Remember that if the personal data field contains an invalid value or if it is empty, then it will be default time zone used |
| Anchor | ||||
|---|---|---|---|---|
|
...
2 - Action
In this section you can choose the action that the task will have to perform. You can choose between:
Send an email message
- Send an SMS
- Move or copy recipients without sending any type of sending, in order to segment them, copying them to another group or moving them from the current group to the destination one
| Note |
|---|
Move/Copy Recipients This function is particularly useful in the construction of multi-message or "cascade" campaigns, since you can configure the system to:
|
In addition to the sending settings (the same that you will find when you want to send an email or SMS message), in the first two cases you will also have the possibility to subsequently segment the recipients, copying them or moving them from one group to another.
| Anchor | ||||
|---|---|---|---|---|
|
...
3 - Recipients
In this step you can choose the conditions for selecting the recipients on which the task will be effective.
| Note |
|---|
Remember to continue creating a task you will need to make at least one selection, among groups, filters and conditions. |
Specifically, you can:
Select Filters and Groups
By including or excluding predefined audience groups
Include recipients who match conditions
You can set all or at least one of the conditions you select as inclusion criteria, including:
- Condition based on days passed since a given event
- Condition based on an identity field
- Condition based on the “true” value of a personal data filter
- Condition based on the "false" value of a personal data filter
- Condition based on the “true” value of an activity / geographic filter
- Condition based on the “false” value of an activity / geographic filter
If the condition is more complex (e.g. 7 days after
...
enrollment, and
...
resident in
...
Piedmont, female),
...
we suggest you
...
first
...
The options that you can configure in the Condition tab are:
- Whether
- Number of days of the occurrence of one of the most frequent events (e.g., subscription, joining a group, etc.).
- the latest activity the recipient has generated
- the latest profile update form has been submitted (for the current list or for any list)
- based on a Profile field (eg, date of registration, birthday, etc ...)
- based on the anagraphic data (true / false)
- based on activities (true / false)
You can also define whether the system should or shouldn't send the same messagecreate one or more filters
Remember that you will need to select a condition to be able to edit its fields.
| Note |
|---|
Creating a condition based on the last click or opening of a recipient We suggest you create an Activity Filter based on these conditions and select it in this step. |
Set the sending frequency for each recipient
In case you do not want to send too many messages in a short period of time to the same recipient, here you can set some time limits in the execution of the task on the individual. Specifically, you can decide to:
- Do not send more than once to the same recipient within 24 hours Send only once to in the selected time range
- Activate the task only once for the same recipient
- OK to send more than once to Send without any limit to the same recipient

The bottom part of the page allows you to further restrict the applicability of the task.
You can:
- Include one or more groups.
- Exclude one or more groups.
This feature is useful when creating "waterfall" campaigns. For example:
- You may want to automatically send a promotional message to all customers with a certain profile (eg, women between 30 and 50 years old)
- Excluding those who belong to the promotion, it is automatically sent on the 15th of the month and the recipient will be copied in the group "Promotion sent on the 15th of the Month" (this option can be configured in the Action tab) when the action is run
- To prevent the promotion from being sent twice to the same recipient, that group is selected among the groups to be run in the Conditions tab
3. Finally, the function Apply these additional filters makes it possible to define the customers' target with more precision. It allows you to select other filters to apply when running an automatic sending. For example, if the automatic sending requires the use of two profile filters, you can apply the first filter at the top of the page and under When the profile filter is true and then select the second filter in the Apply these additional filters.
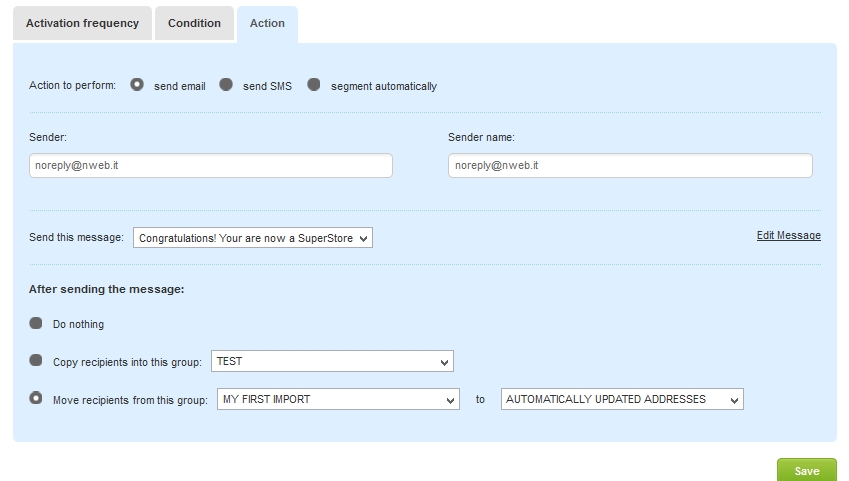
Action
Finally, you need to specify what happens if the Conditions that have been checked are all true. The options are:
- send email
- send SMS
- segment automatically
If the action is sending an email or text message, you can set the sender information and deliver that message to your recipients.
...
...
| Note |
|---|
The "Send once for ... 24 hours" option "protects" my recipients: for example if I am sending an automatic message when a user's birthday occurs, using this option I will send the message only once a day |
| Anchor | ||||
|---|---|---|---|---|
|
...
4 - Frequency
In this section you can determine when to activate the task and possibly prevent its activation in certain circumstances.
Activation frequency
In this section you can decide when the task will be activated cyclically. You can select a daily, weekly, monthly and yearly frequency, but also specify a specific activation time or an hourly interval.
Exceptions
Select a time range in which the task will be active, or simply select a start date.
You can also exclude from activation:
- Specific dates
- Recurring dates
- Saturday and Sunday
- Outdated RSS feeds
- Specific time slots
Management of the conflict between activation and limitations
If the limitations set invalidate the temporal conditions for activating a task, you can decide to activate it at the first useful opportunity (for example the day after the one scheduled in the case of a monthly recurrence) or not to activate it at all.
Once you have selected the previous options you will have the option to Save the Task.
| Anchor | ||||
|---|---|---|---|---|
|
...
5 - Summary
This section allows you to view all the information entered and the options selected for the task in question.
Task activation
You can activate or deactivate the task, just as if you were doing it from the task list. This option is the first one displayed on the summary page
Change the data entered
If, re-reading the selected options, you find something that does not convince you, you can go and modify the relative step thanks to the link next to the arrow of each panel. You can also edit the individual steps by clicking on them.
Simulation
Thanks to the Simulation function, found at the bottom of the page, you can obtain a simulation of how many recipients the simulation would reach if it started when you request it. Time restrictions set in exceptions will not be taken into account for counting purposes
...
How to Create a Birthday Task
How to Create a Birthday Task
| Panel | ||||
|---|---|---|---|---|
| ||||
1- Create a new message with eg. "Happy birthday" object; 2- Create a birthday demographic filter
3- Create a Task in which among the conditions select the birthday registry filter (created in point 2); 4- Among the actions you can choose whether to send the newsletter dedicated to the birthday, or move / copy the contacts from one group to another;
|