...
...
...
...
...
...
...
...
...
...
export data saved in MailUp platform (recipient fields)
Several options allow you to change the way the Preference Center is presented to your customers.
...
| Info | ||
|---|---|---|
| ||
| Which lists are to be shown or hidden in the Preference Center is set at the list level. When you set the lists to be shown in the Preference Center, the list that is currently active in the MailUp console (the one that you are working in) is always enabled by default, whereas the others are not. If you have 4 lists, and you want all 4 lists to be shown when someone clicks on the link to the Preference Center in messages sent from all 4 lists, you must access the Preference Center admin tools from each of the list in the MailUp console, and enable the lists that should be shown. |
How it looks to your customers
In the first tab you can view the text that will be shown to your customers before each section:

...
Texts displayed and look and feel
All the texts in the preference center are fully customizable.
Each section has a drop-down menu named Customize section texts or a dedicated field that allow modifying title and description.
You can preview the final result by clicking the button "Preview & Save" in the
...
right corner of the screen
...
The Look & Feel can be changed by editing the header and footer via the Settings > Account Settings > Look & Feel tools in the MailUp admin console.
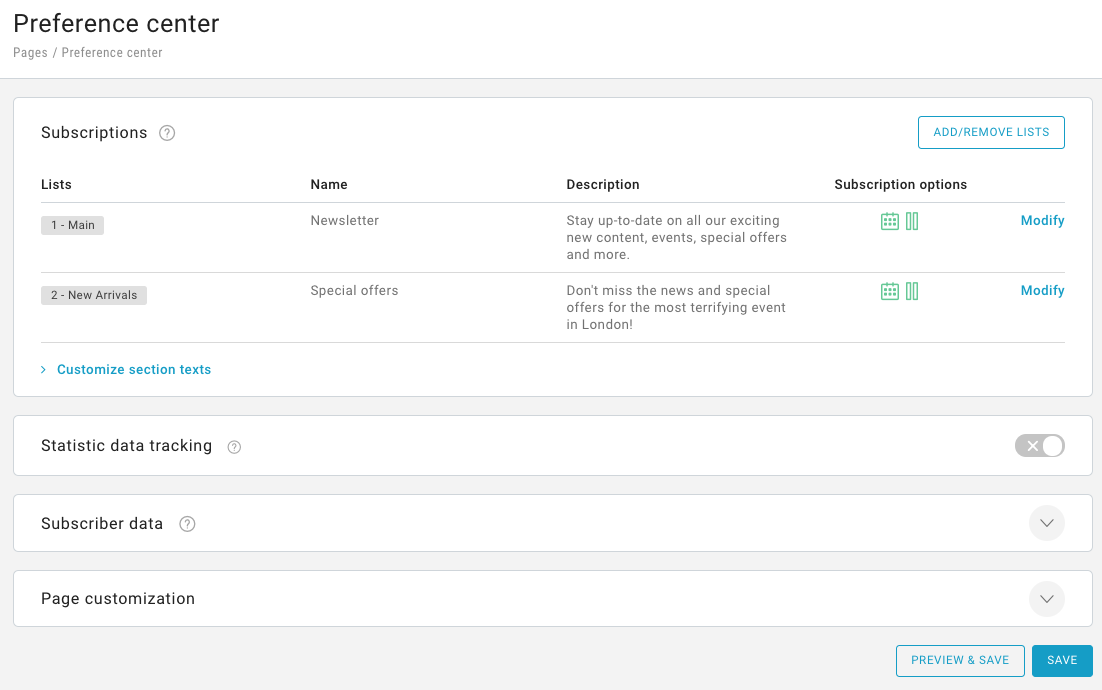
Subscriptions tab
...
.
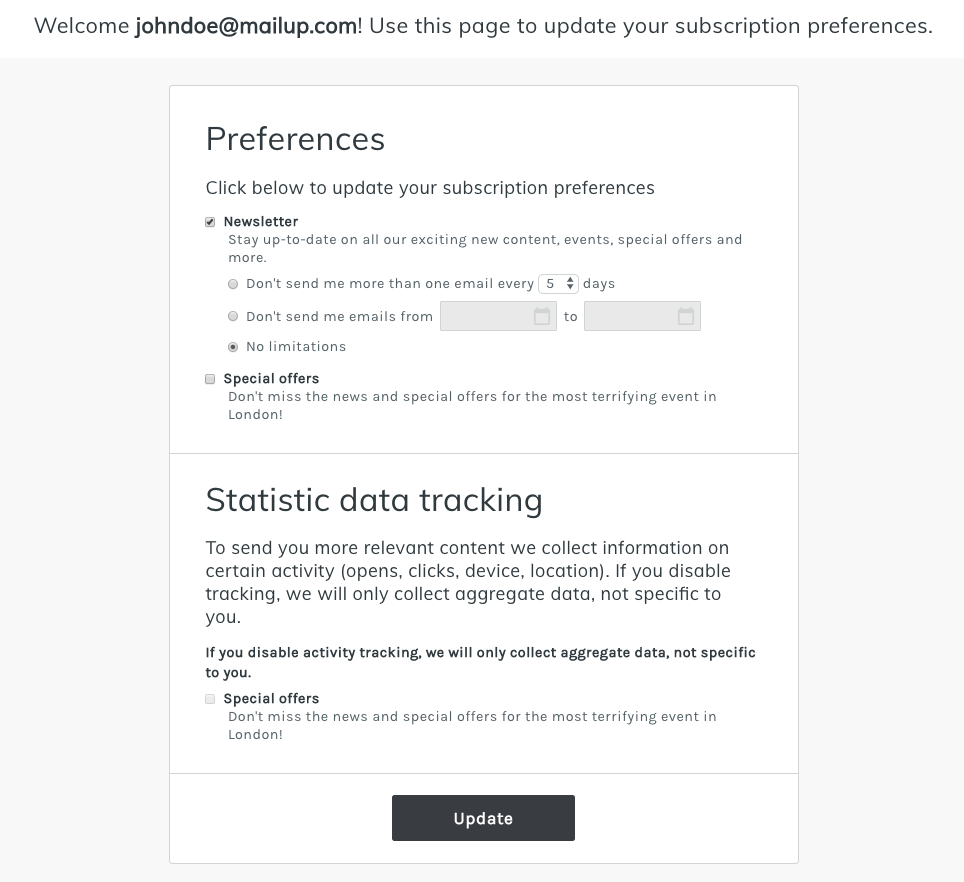
Subscription, frequency, delivery suspension, and tracking preferences set up
In this tab, you can decide which lists you want to show to your subscribers encouraging them to subscribe to others. The list you are in is the enabled one.
It allows you also to
...
show a name and description, which can be different from the internal name and description for the lists used in the MailUp
...
platform.
For example, you could use this section to promote content that your customers/recipients might not be aware of
...

...
Daily offers, News, Most read blog news...
You can decide which lists you want to show to your
...
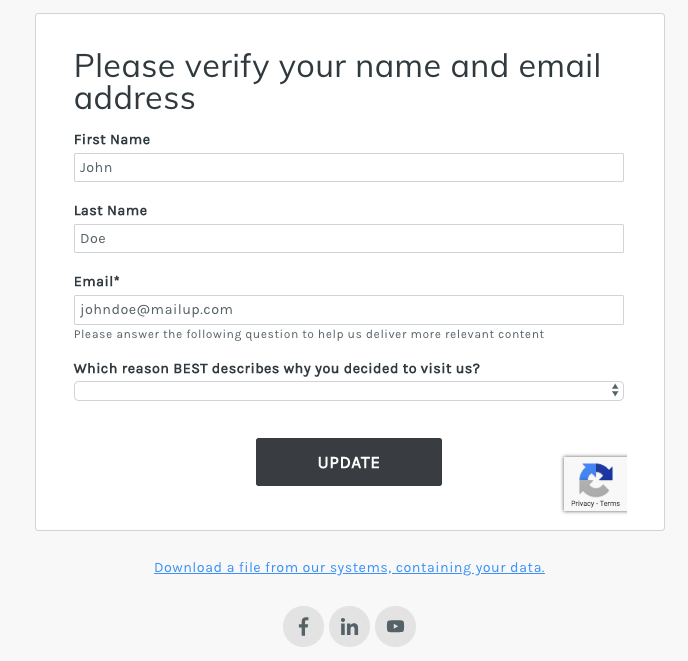
Personal profile tab
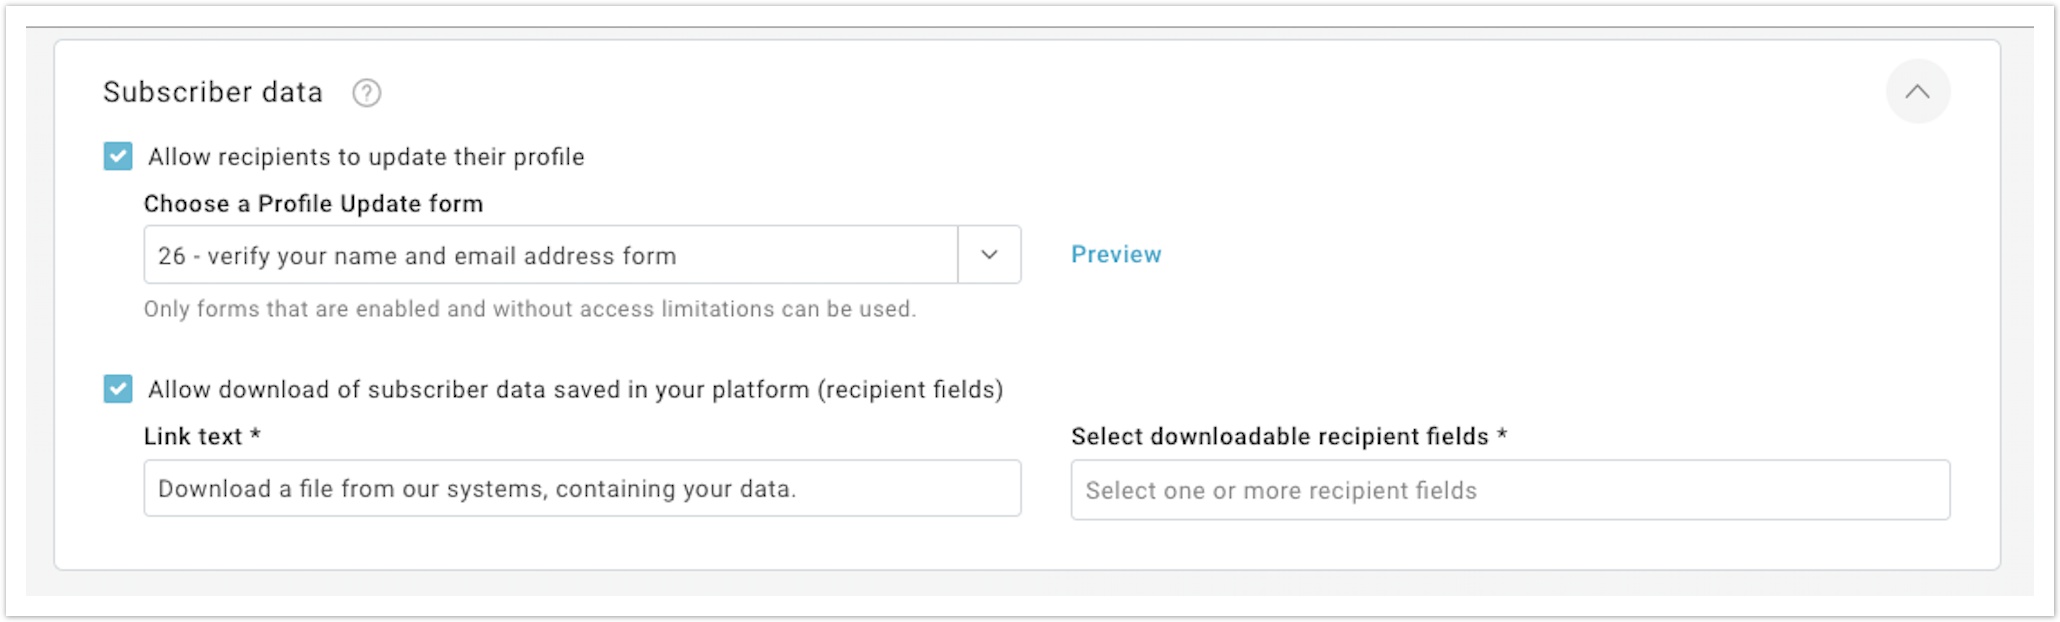
This section allows you to insert a Profile Updates form in your Preference Center.

The default form has a look that especially matches the Preference Center look and feel. If you wish, you can choose any other ready-to-go form or edit the defualt one under Marketing+ > Profile Updates.
Just like any other section in the Preference Center, you can choose whether to show this one to your recipients or not.
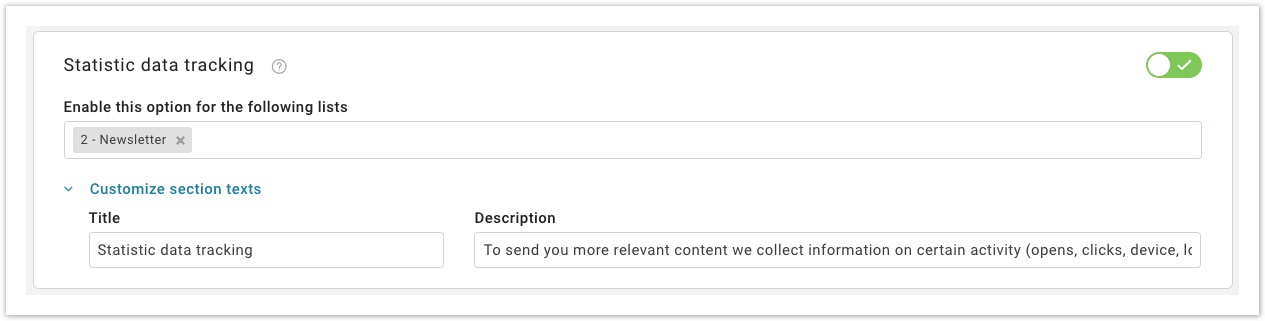
Data collected tab
In this section, you can let your recipients disable tracking, so that their activity will be anonymous and won't be linked to their profile,

Here, your recipients can choose if they want to:
...
![]()
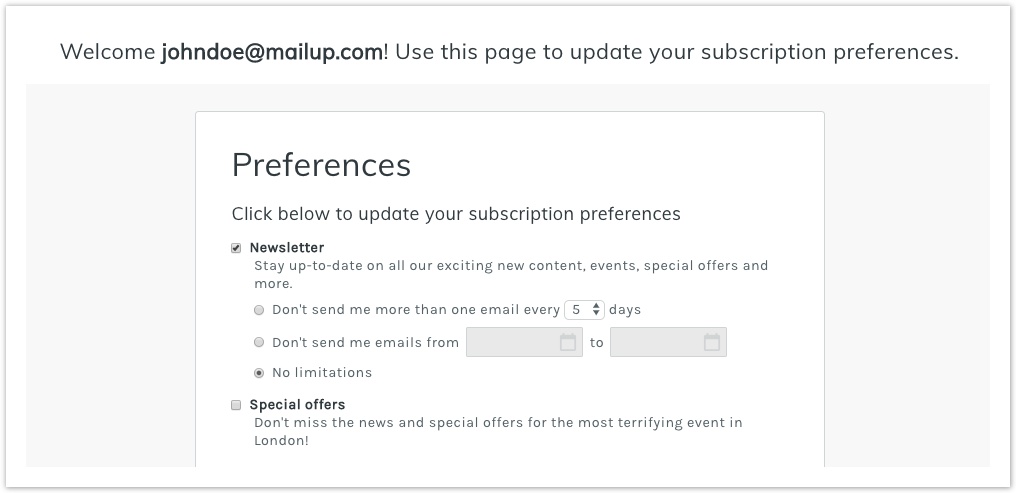
Frequency tab
If you decide to show this menu to your recipients, they will be able to:
- set the maximum number of messages that they want to receive
- set a period of timeduring which they prefer not to receive any message (e.g. because they are on vacation)
These option are also available when configuring the confirmed unsubscribe with options.

Social profile tab
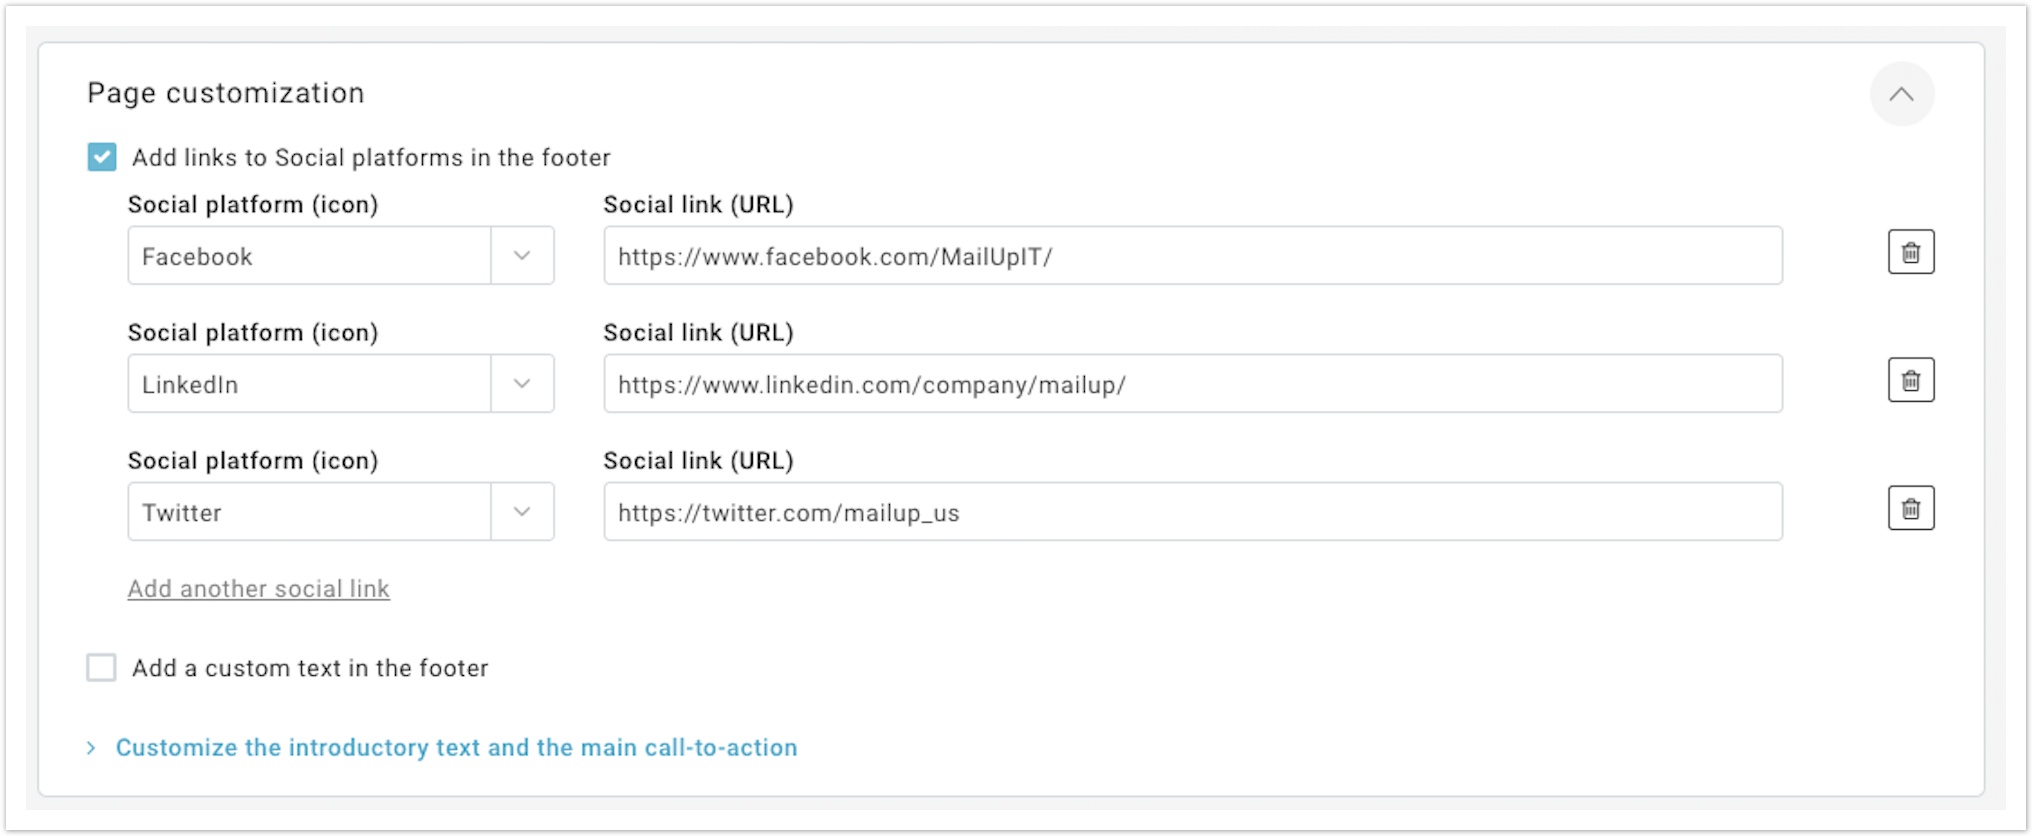
Finally, you can configure the social profiles linked to the list.
Lists do not initially contain Social media accounts, so this section is not shown to your recipients. If you want this section to be shown to your contacts, all you need to do is add one or more accounts under Settings > List settings > Social media accounts, and then select at least one of them ("View").
This way, your social profiles are shown to your recipients, and they can click them to like them on Facbook, follow them on Twitter and view the LinkedIn profiles.

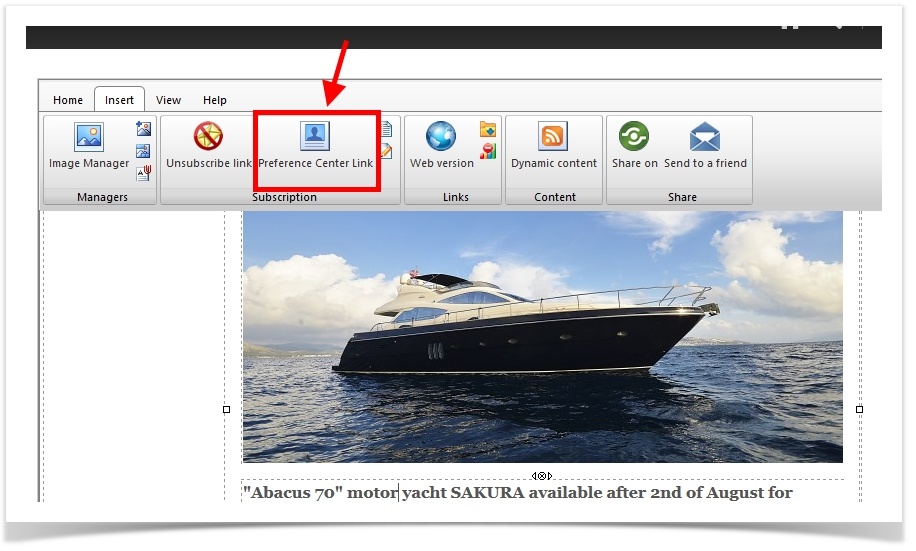
Insert the link to the Preference Center in your messages
subscribers by adding or removing them through the button Add/Remove lists. To enable other lists, remember to check the box of the list you want to add in the Preference Center.
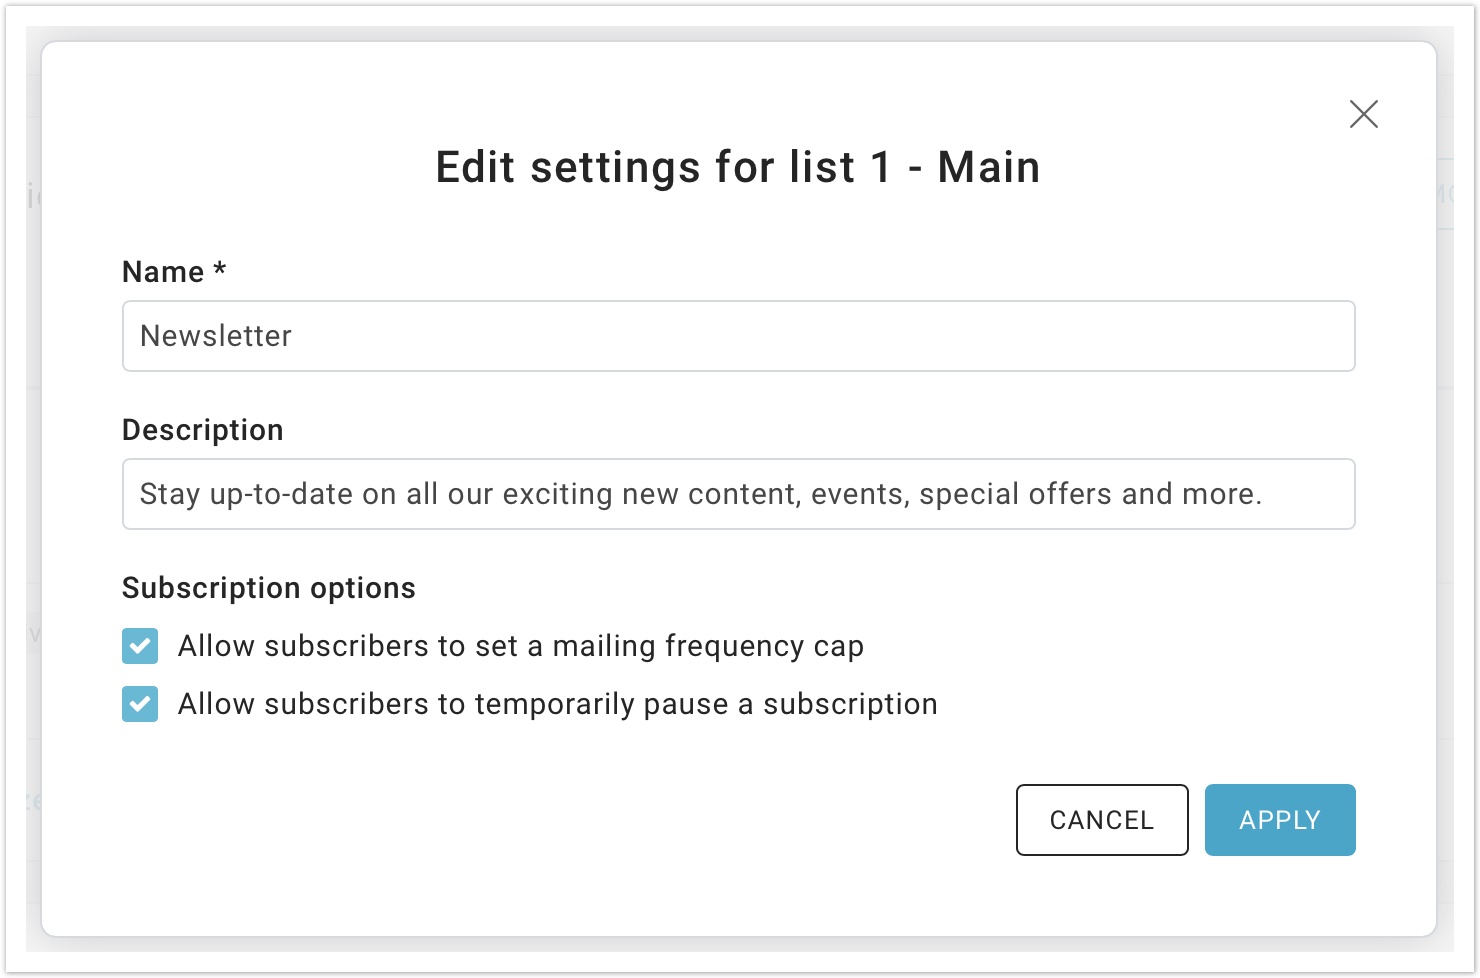
For each list, you can allow subscribers to:
- set a mailing frequency cap,
- temporarily pause a subscription (e.g. because they are on vacation).
Once logged in the Preference center, subscribers will see all the lists they can subscribe to:
By enabling the statistical data tracking section you can also allow recipients to disable activity tracking for statistical purposes. Enabling the option, in all cases where disable tracking is requested, the campaign statistics will only be shown at the aggregate level and will not be visible as generated by the recipient.
The most option can be enabled for one or more lists.
Subscriber data tab set up
The Recipient Data section allows you to enter a Profile Update form within the Preference Center to allow recipients to update their data themselves. Select the form you wish to insert in the Preferences Center, choosing from those already created in the Pages> Profile updates section. The form style will be automatically aligned to the preference center one. Select preview to see the form.
| Note |
|---|
To insert a Profile Update form, please verify in the Database building> Profile updates section that the form is enabled and does not have limited time access. |
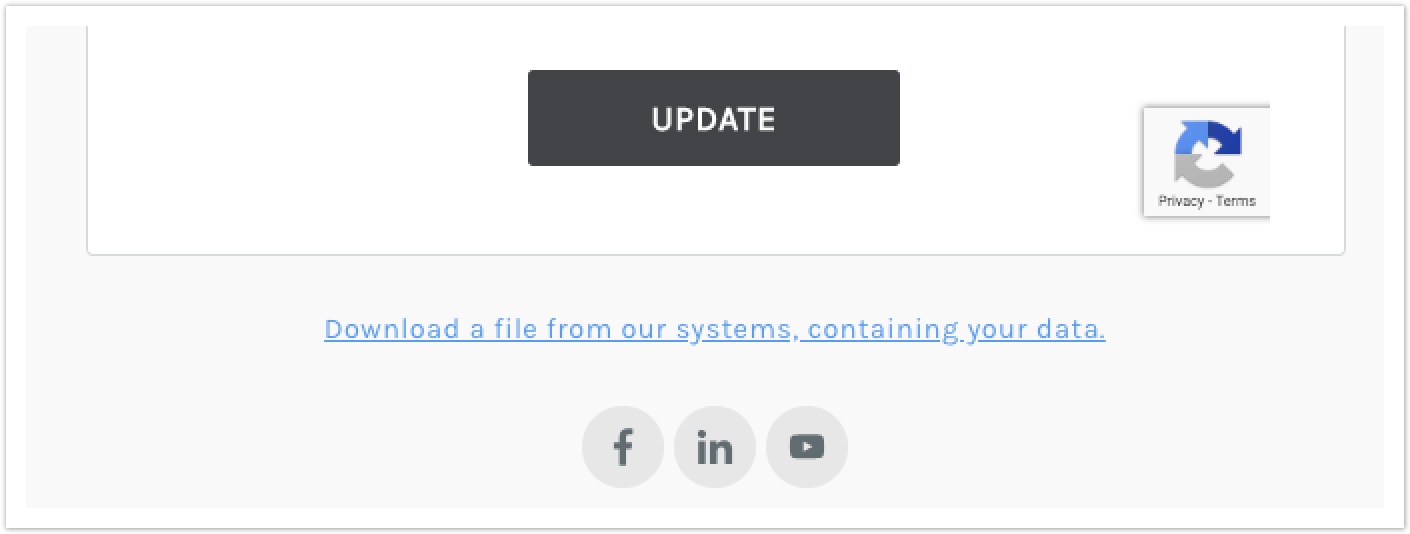
Subscriber data download
Allow download of subscriber data saved in your platform (recipient fields).
You can decide which recipient fields you want to make downloadable by adding them to the bar.
If the option is enabled, the user will see a link at the bottom of the page, like in the image below.
Page customization
The last section of the preference center allows you to add:
- links to your social network channels,
- a custom text in the footer,
- and finally to personalize the introductory text and the main call to action.
Preview
To generate a preview of the Preference Center click on "Preview & Save".
| Note |
|---|
To enable the preview button you should have at least one recipient in the group "TEST". |
Insert the link to the Preference Center in your messages
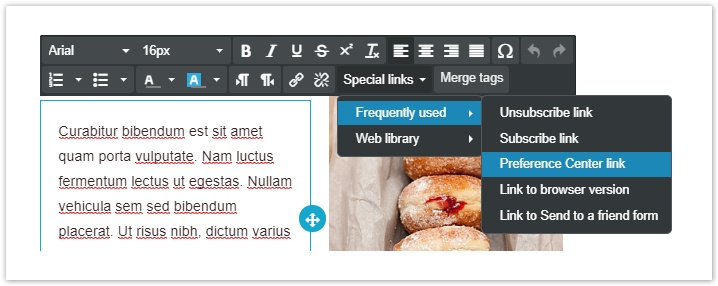
To insert a link to the Preference Center in a message created using BEE editor, select "Special link" in the Action menu on the left under the Content tab.
Alternatively, you can link the Preference Center directly in the text: to do so select where you want to add the link and click on "Special links" and from the drop-down menu select "Frequently used" and finally "Preference Center link".
When you are creating or editing a message using the
...
HTML editor, you can insert the link to the Preference Center using the button under Messages > New > "Insert" tab in the editor menu
...

...
.