Overview
The innovative List+ feature allows you to easily send an email from any program (e.g. Outlook, Gmail, Yahoo! Mail, etc.) to multiple recipients, leveraging the MailUp system. Say "good-bye" to the old idea of distribution lists, and "hello" to the smart email addresses that you can leverage through MailUp's new List+ feature.
...
- Easily create a group of colleagues and send a message to them
- Send a personal note to all your customers, right from your favorite email client, without having to log into Mailup
- Forward interesting news articles to the marketing team
- Send quick updates to the sales team
- Mail updated pricing information to your resellers
Using List+
Activation
Log into the MailUp console and select Settings > List settings > List+. You will find a button to enable the feature.
Authorizing senders
In order to be able to use List+, you need to add the email address that you will be sending messages from to the list of authorized senders.
Click on the corresponding button to add a new sender, and enter the email address that you you are authorizing.
| Note | ||
|---|---|---|
| ||
| Please note that the sender(s) that you authorize here will NOT be the actual sender of the message. The sender of the message will be the default Send Email and Send Name specified for the List. |
The same address will be used by MailUp to authorize a new List+ mailing, unless an alternative address is specified.
The reason why you have the ability to specify a separate address for mailing authorizations is that you may be sending the message from an application - which uses a certain email as the sender - but may want another person to authorize the mailing.
| Warning |
|---|
| Although the system allows you to turn off the required mailing authorization, we strongly recommend that you do not do so. If you do, there is the possibility of messages being sent to a potentially large number of recipients without authorization. For instance, think of a virus infection that may affect the computer from which List+ messages are sent. |
How a List+ mailing works
Inviare un messaggio a tutta la lista è semplicissimo.
Invialo all'indirizzo che si trova nella pagina 1-a-molti formato da una serie di codici:
list(IDlista).c(IDconsole).(codice di sicurezza)@2many.it
Ogni console, ogni lista ha un indirizzo specifico con scadenza dopo 3 mesi. Se vuoi accrescerne la sicurezza, puoi rigenerare il codice di sicurezza in qualsiasi momento.
| Warning |
|---|
Se mandi il messaggio a più indirizzi, inserendoli nel campo A: della tua email, inserisci sempre l'indirizzo 1-a-molti per primo o non potremo procedere con l'invio. |
Dopo aver mandato il messaggio all'indirizzo, riceverai un'email con la richiesta di autorizzazione, come questa:
L'autorizzazione include i dettagli del messaggio:
- oggetto
- numero di destinatari
- lista
L'invio è programmato a partire da 5 minuti dopo l'azione di clic sul messaggio. Poiché il messaggio esce con le stesse modalità degli altri dalla console, se ci sono altri invii in corso, sarà semplicemente programmato per l'invio dopo questi.
Altri modi d'uso
Puoi utilizzare questa funzione anche per altre attività come:
- invio di un messaggio di test all'utente abilitato (per esempio per vederne la testata e il piè di pagina) > usa test.list(IDlista).c(IDconsole).(codice di sicurezza)@2many.it
- salvataggio di un messaggio nell'elenco (molto utile se hai modelli di creatività salvati su altri strumenti email e li vuoi importare con un solo clic) > usa save.list(IDlista).c(IDconsole).(codice di sicurezza)@2many.it
- invio di un messaggio solo a un gruppo presente nella tua lista. Inserisci il codice del gruppo (che trovi in Destinatari > Gruppi) > g(IDgruppo).list(IDlista).c(IDconsole).(codice di sicurezza)@2many.it
Tutte queste modalità sono semplici da utilizzare perché richiedono solamente di aggiungere un "prefisso" all'indirizzo che trovi nella pagina 1-a-molti.
Notifiche
Nel Centro notifiche puoi modificare le due notifiche relative all'invio 1-a-molti:
- notifiche di invio avvenuto con successo, che puoi eventualmente eliminare se non ti interessano
- notifiche di problemi con l'invio 1-a-molti che non sono eliminabili. Queste notifiche sono un eventuale segnale d'allarme per esempio nel caso un utente non abilitato abbia provato ad inviare un messaggio alla lista e ti permettono di scoprire subito se qualcuno cerca di abusare della funzione
...
| title | Attenzione |
|---|
Per ogni richiesta è inviata un'email di autorizzazione. Più richieste invii, più email di autorizzazione sono spedite.
In caso di richieste multiple, solo l'ultima ricevuta è utilizzabile se quella precedente non è ancora stata autorizzata.Questo comportamento evita eventuali abusi della funzione.
Ti consigliamo quindi di autorizzare ciascun messaggio prima di inviarne un altro.
Esempio: mando due messaggi, A e B, a distanza di due minuti alla stessa lista (o a un gruppo della stessa lista) dallo stesso utente autorizzato all'invio 1-a-molti.
Se, prima di ricevere il messaggio di autorizzazione per l'invio B, clicco sul pulsante di autorizzazione all'interno del messaggio di conferma per l'invio A arrivato prima, entrambi verranno inviati senza problemi.
...
Using List+ is extremely easy. Log into your MailUp admin console and select Settings > List settings > List+
The page shows you the List+ email addresses that you can use for various purposes, and the syntax to create new ones. You can send a message to an entire List, to a group, etc. See below for all the details.
The mailing works as follows:
- If you want to send to the entire list, that address is immediately shown to you: simply copy and paste it into your email program
- If you want to send to a group within the list, copy and paste the address into Notepad or another text editor, and edit it according to the syntax mentioned below under "Sending a message to one or more groups"
- Now take the List+ address and save it within your contacts of your email client, so you don't have to memorize it. Label it with a good description, so you can easily locate it next time, without having to access the MailUp admin console.
- Use the address in the "TO" field just like any other email address
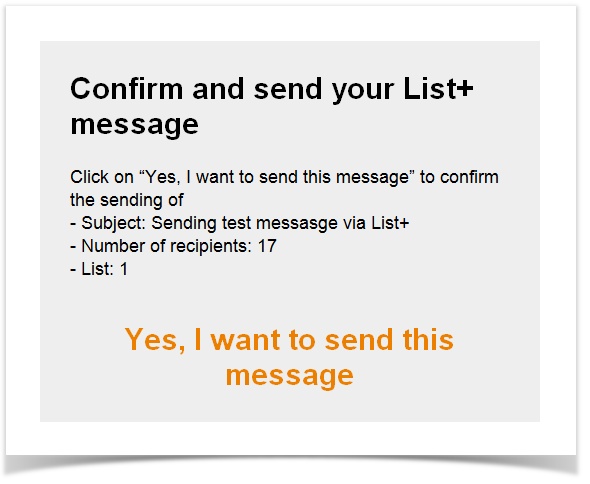
- After you send the message, you will receive an mailing authorization request, like the one shown below. It contains
- The subject of the message that you are about to send
- The number of recipients that it will be sent to
- The ID of the List
- Once you confirm the mailing, the message will be added to the mailing queue and sent within 5 minutes.
| Warning | ||
|---|---|---|
| ||
Please note the following:
|
Sending a message to an entire list
Log into your MailUp admin console and select Settings > List settings > List+
MailUp will show you the List+ address for the selected list at the top of the page. Copy and paste it in your email client to send a message to the list.
The address is structured as follows:
list(list_ID).c(console_ID).(security_code)@2many.it
Please note:
- Each MailUp account has a different console_ID
- Each List within that console_ID has a different ID
- The security_code changes is also unique. For extra security it is recommended to change it every 90 days by clicking on the Change security code button.
Sending a message to one or more groups
Log into your MailUp admin console and select Settings > List settings > List+
Expand the area where sample List+ addresses are shown. You will see an example of a List+ address used to send to Group ID 1. Copy and paste it in a text editor and replace the ID with the ID of the group that you wish to mail to.
Specifically, to send a message to a group, use a List+ address that is structured as follows:
g(group_ID).list(list_ID).c(console_ID).(security_code)@2many.it
To send a message to 3 groups, for example, use a List+ address that is structured as follows:
g(group_ID).g(group_ID).g(group_ID).list(list_ID).c(console_ID).(security_code)@2many.it
You can find the Group ID either in the page that lists all Groups under the Recipients menu, or in the Codes Table under Settings > Account settings > Developer's corner
Sending a test message
You can send a test message to the authorized sender, to preview how the message will look. To do so, use the address:
test.list(list_ID).c(console_ID).(security_code)@2many.it
Saving a message in MailUp
You can also use List+ to save a message into your MailUp console. This is useful if you created the message elsewhere. To do so, use the address:
save.list(list_ID).c(console_ID).(security_code)@2many.it
You will find the exact address to use for a certain List by visiting the List+ page under Settings > List settings in your MailUp account.
In this case no message is sent. The message you send to the List is simply saved to that List and can be found under Messages > Email > Saved
If you are starting from scratch:
- Create the message in your favorite email editor
- Send it to your MailUp account using the List+ address mentioned above
If you already have an HTML message:
- View the HTML message in your browser
- Select all (CTRL+A)
- Copy (CTRL+C)
- Paste into a new, empty message in your email editor
- Send it to your MailUp account using the List+ address mentioned above
Alerts
In the Alerts center you can view and modify the alerts that pertain to the List+ feature.

At the time of this writing, there are two alerts pre-configured in the system:
- Mailing successfully sent
- Issue with a List+ mailing. For example, a List+ mailing was requested, but not authorized. These alerts are very important as they allow you to find out if somebody is trying to gain unauthorized access to the feature.
| Warning | ||
|---|---|---|
| ||
Please note that for each mailing request the system sends an authorization message. If there are multiple mailing requests, multiple authorization messages are sent, but only the latest one can be used if the previous one has not been authorized. This prevents the feature from being abused. Therefore, we recommend that you authorize each List+ mailing before sending a new one. Here is an example:
|