Viewing Existing Profile Update Forms
To view the Profile Update Forms that have already been created, select Marketing+ > Profile updates

The page shows:
- Form name and description
- Start date (optional) and End data (optional)
- Whether the form can only be filled once (One time)
- Whether the form has been enabled or not
You can...
- Click on the form name to view a preview of it
- Click on the Actions menu to edit the form, delete it or create an HTML copy (if the form was designed with the drag and drop form builder).
What's Next?
Once you have created a profile update form, what are the next steps?
- Create a new email message
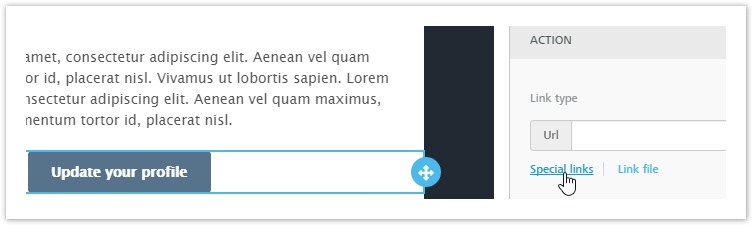
- If you're using BEE, you can link the form to a button, by selecting it and choosing Special Links in the "Action" section of "Content Properties".
You may also link a profile update form to a portion of text, by highlighting it, toggling the advanced toolbar with the arrow in the top right and selecting Special links > Profile update forms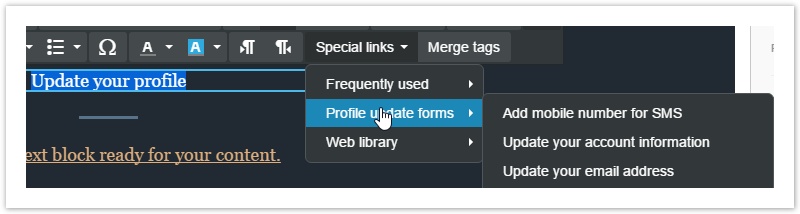
- If you're using the HTML editor, you can link a part of the message to a profile update form using the "Profile Update link" found in Insert > Subscription
- If you're using BEE, you can link the form to a button, by selecting it and choosing Special Links in the "Action" section of "Content Properties".
- Finalize and save the email message
- Send it to a test group to simulate the entire process
- When you get the test email, fill out the form and submit it
- Confirm that the Recipient Fields associated with the recipient that updated the form have been successfully updated